


-
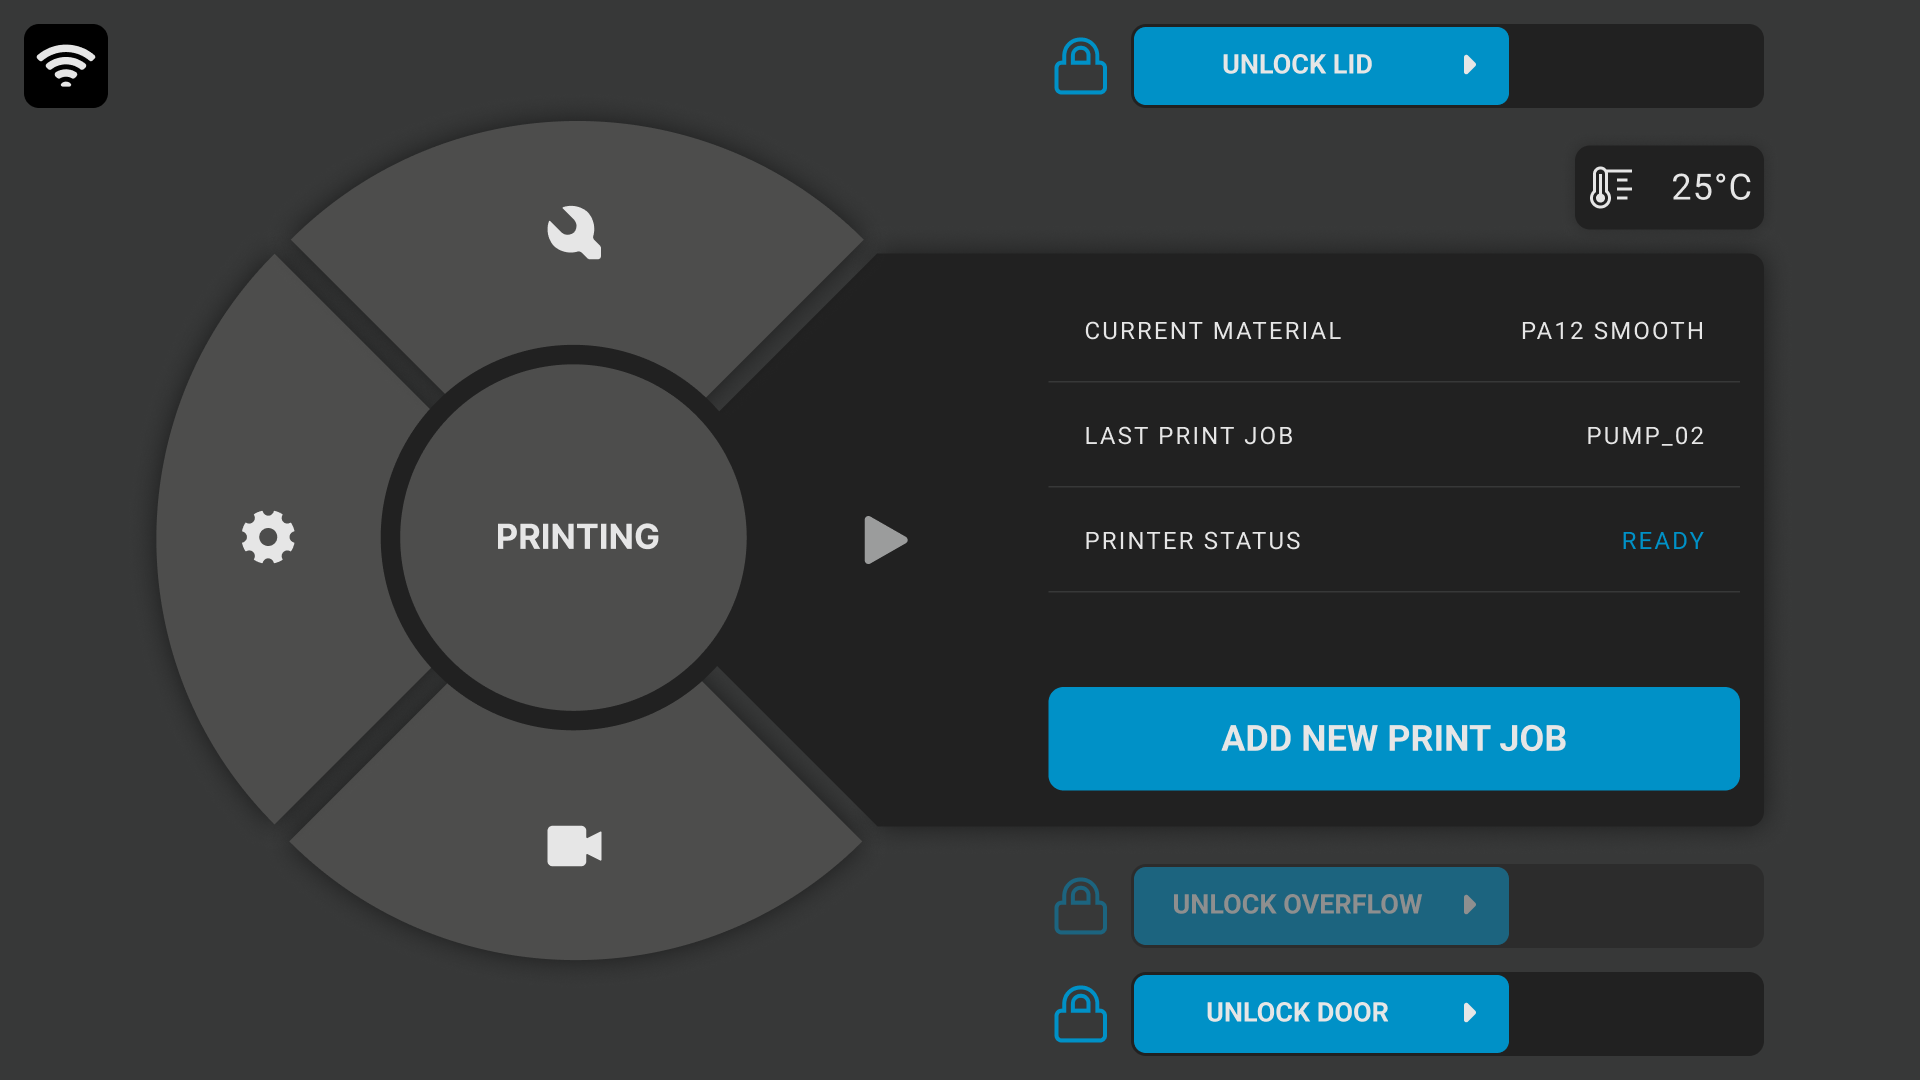
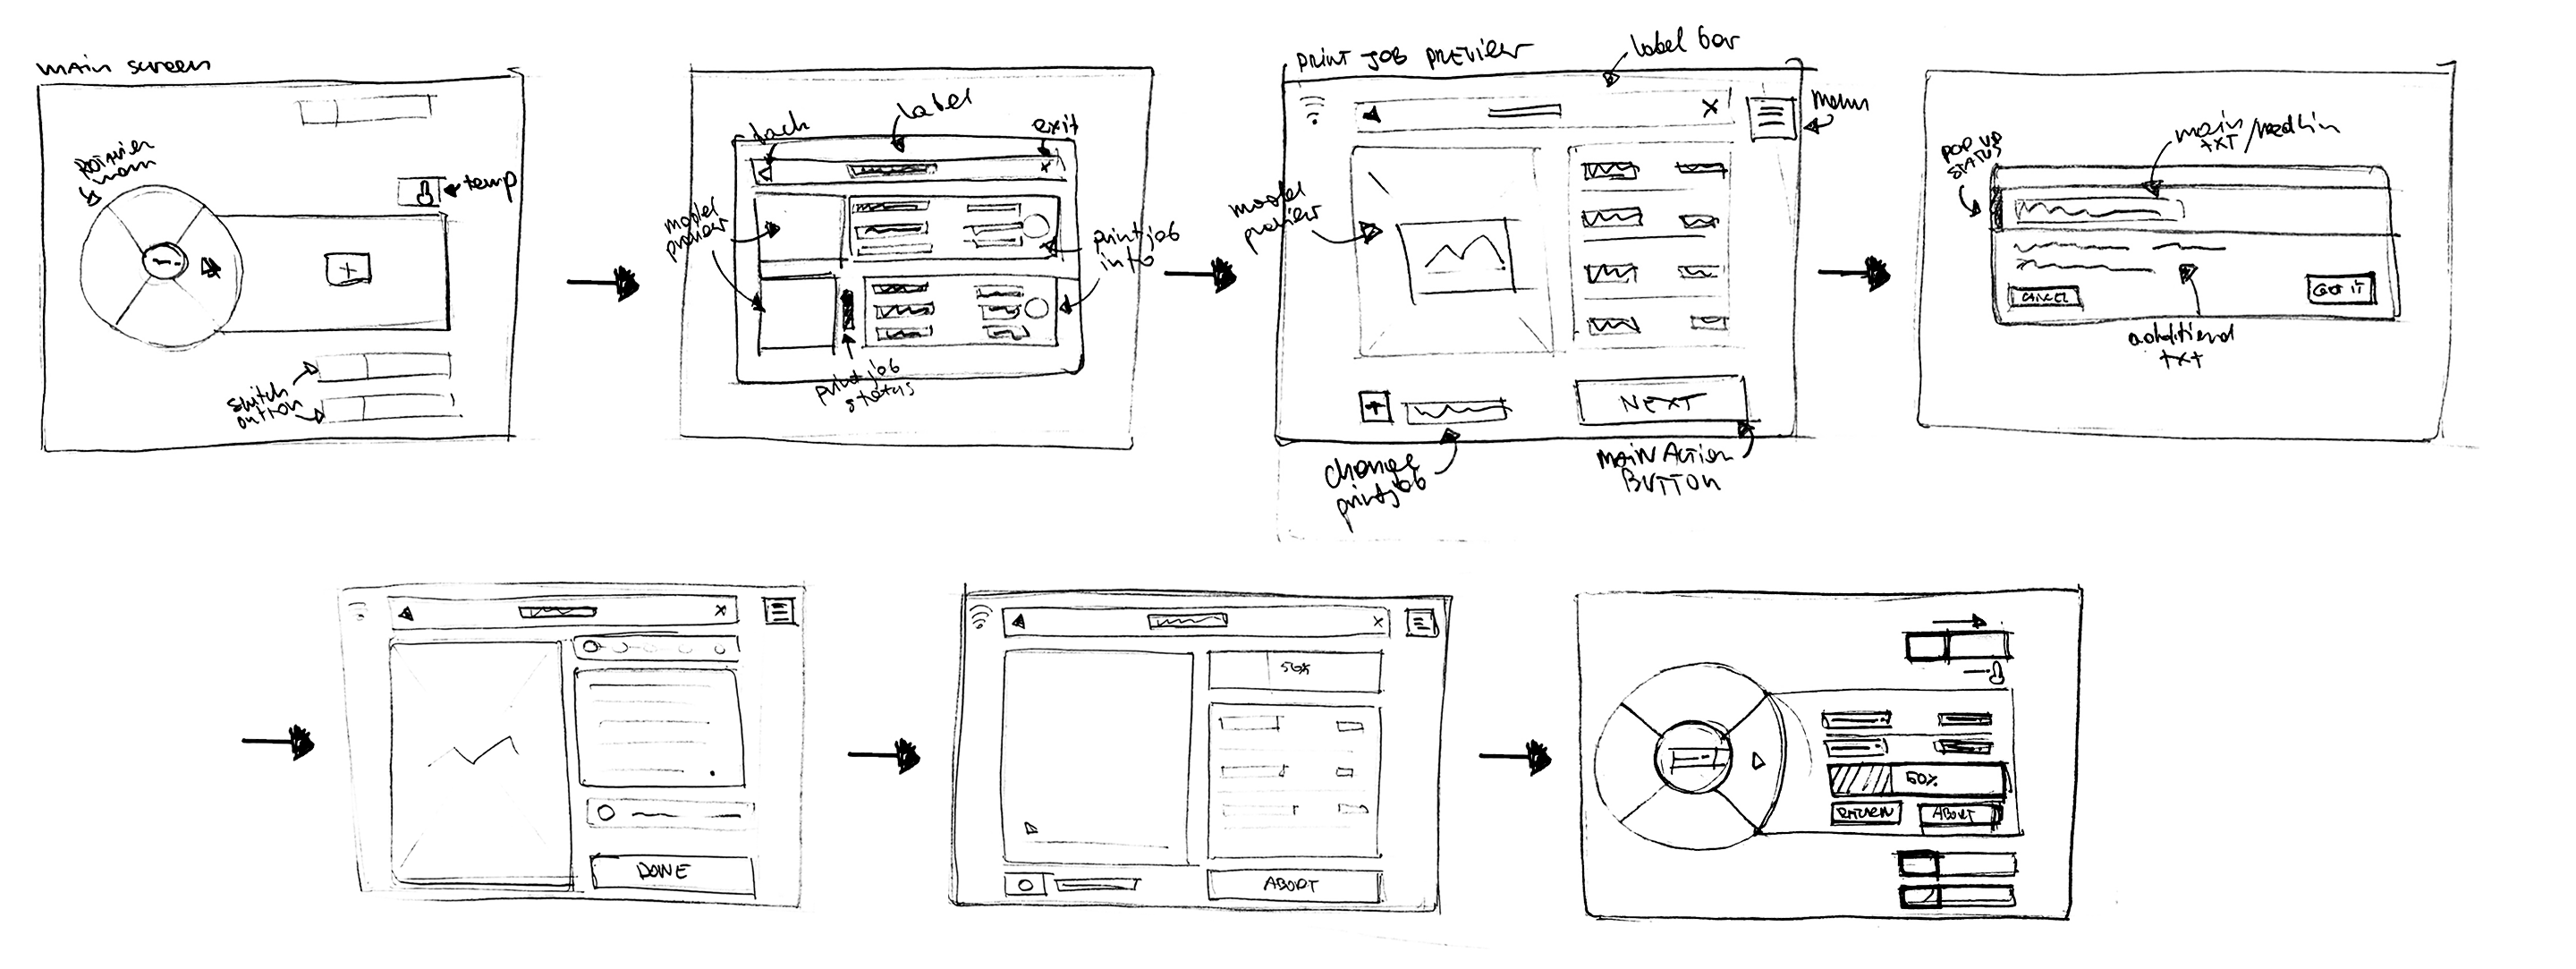
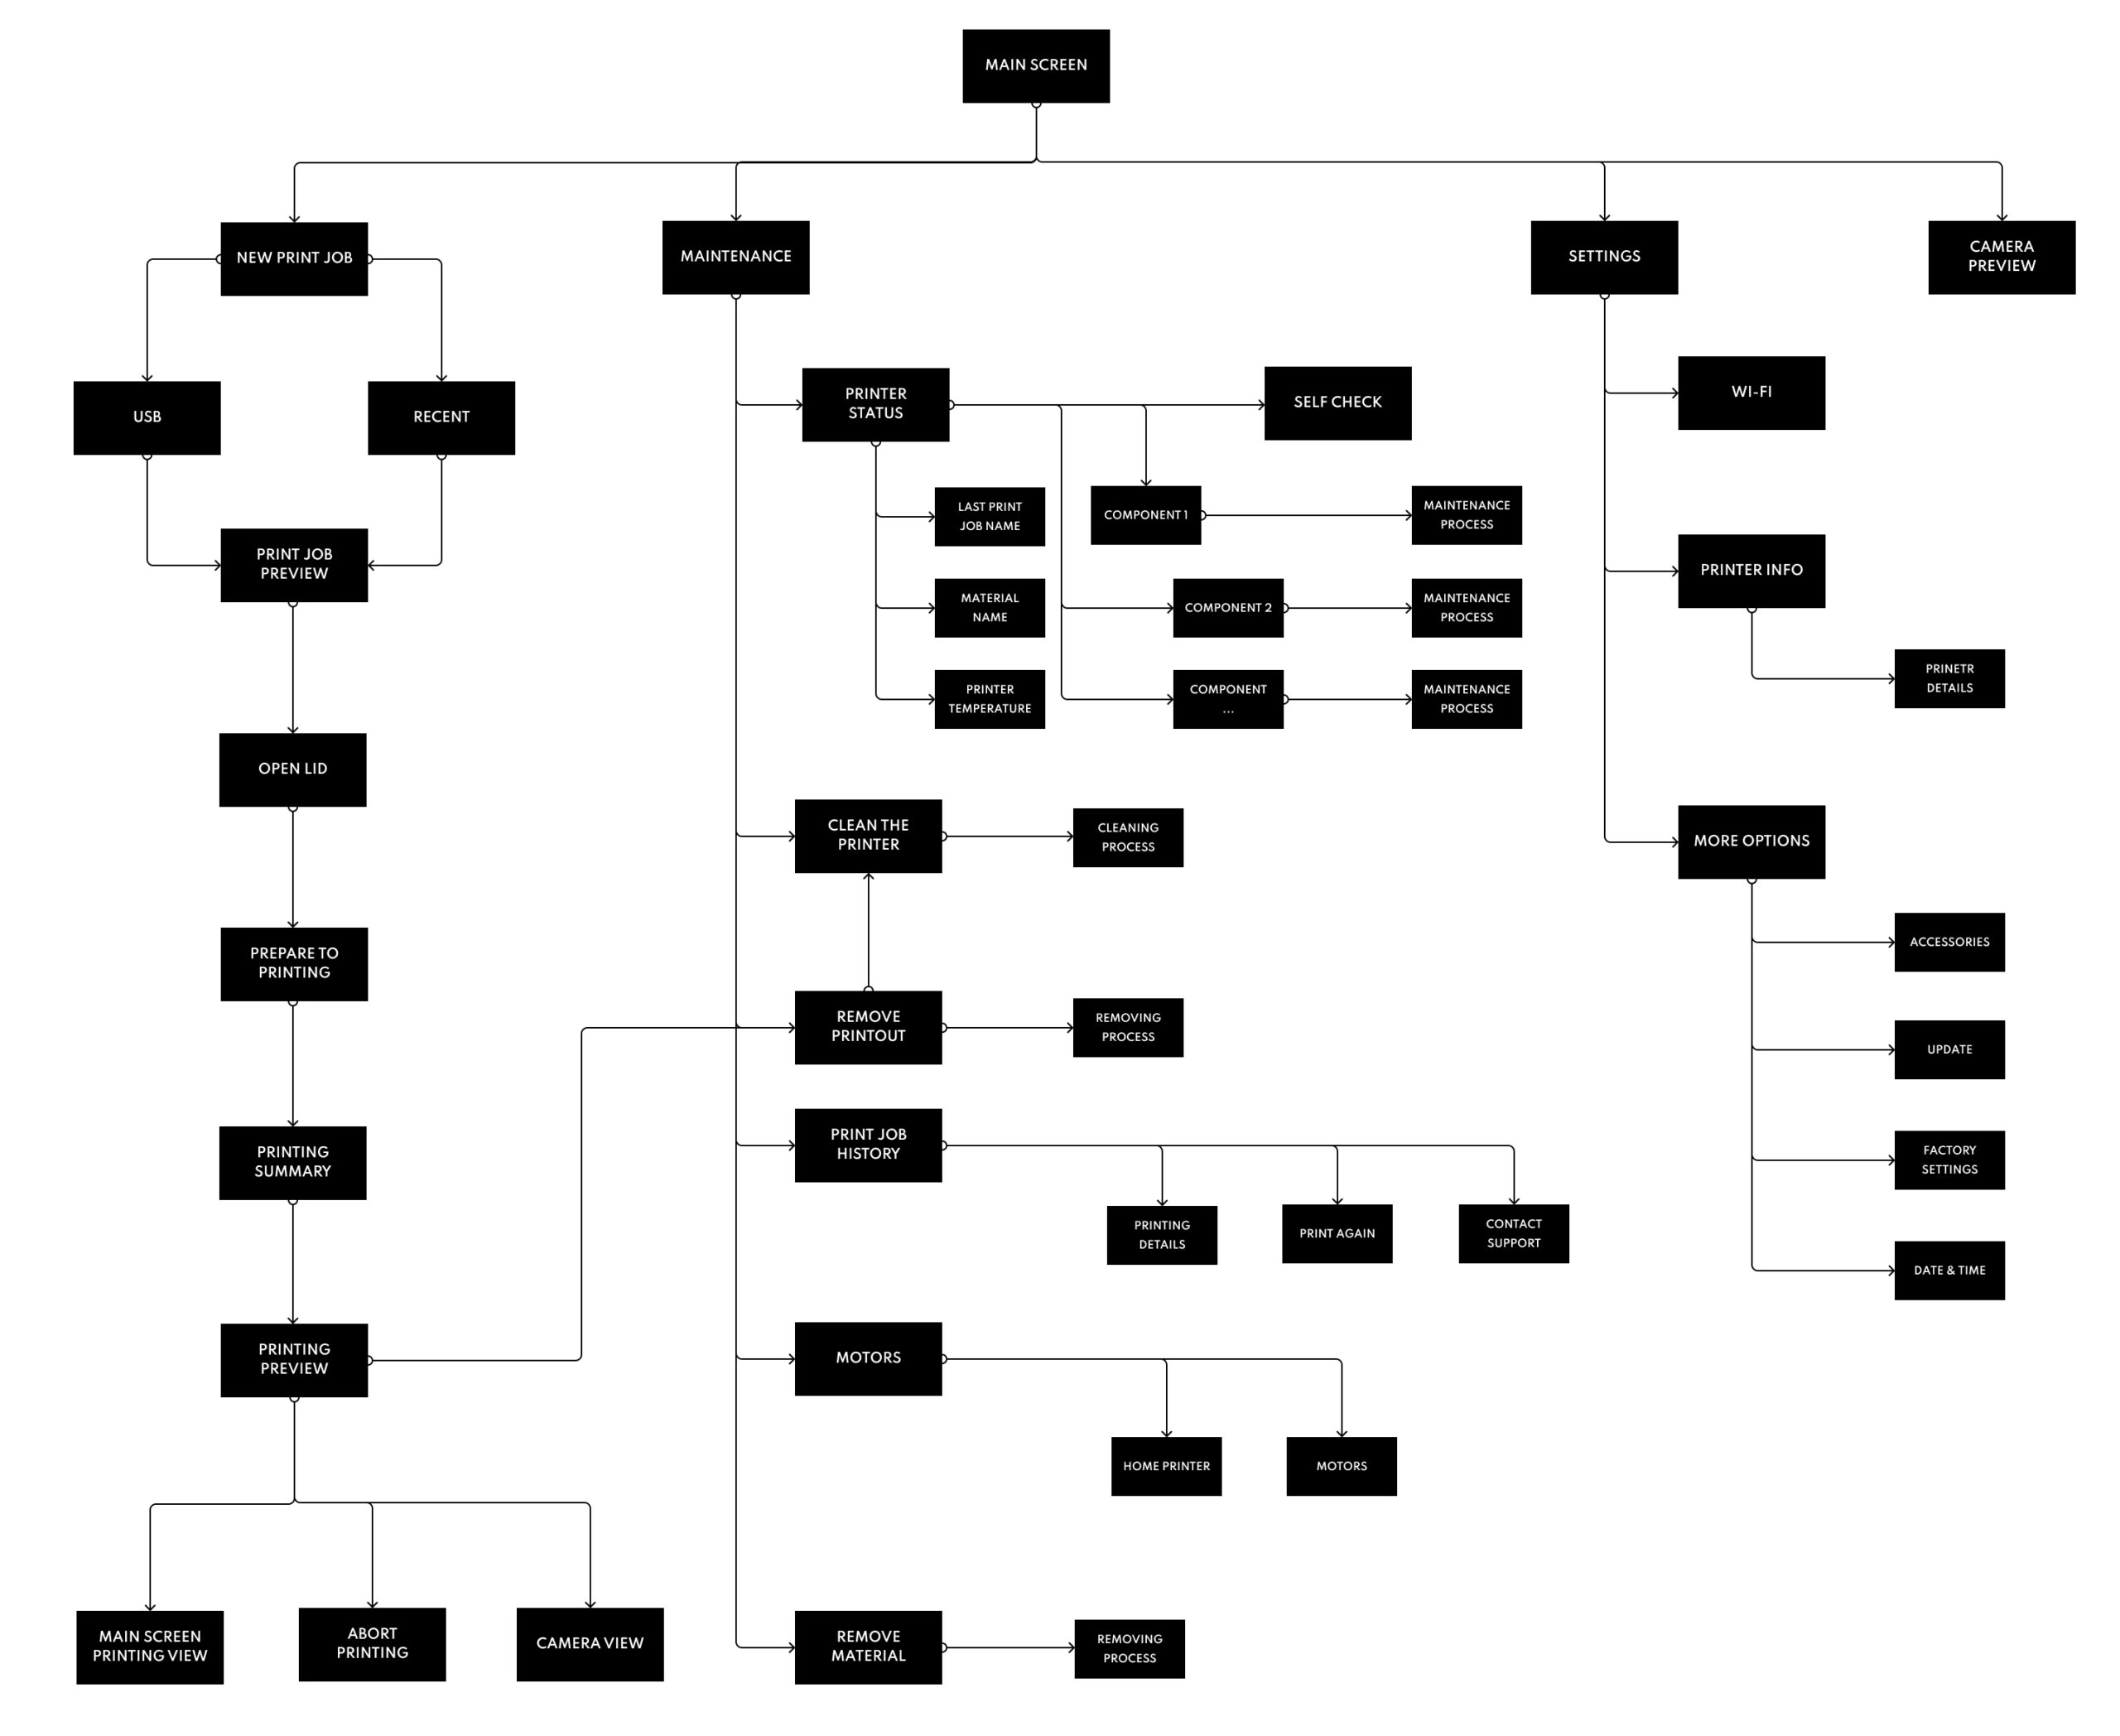
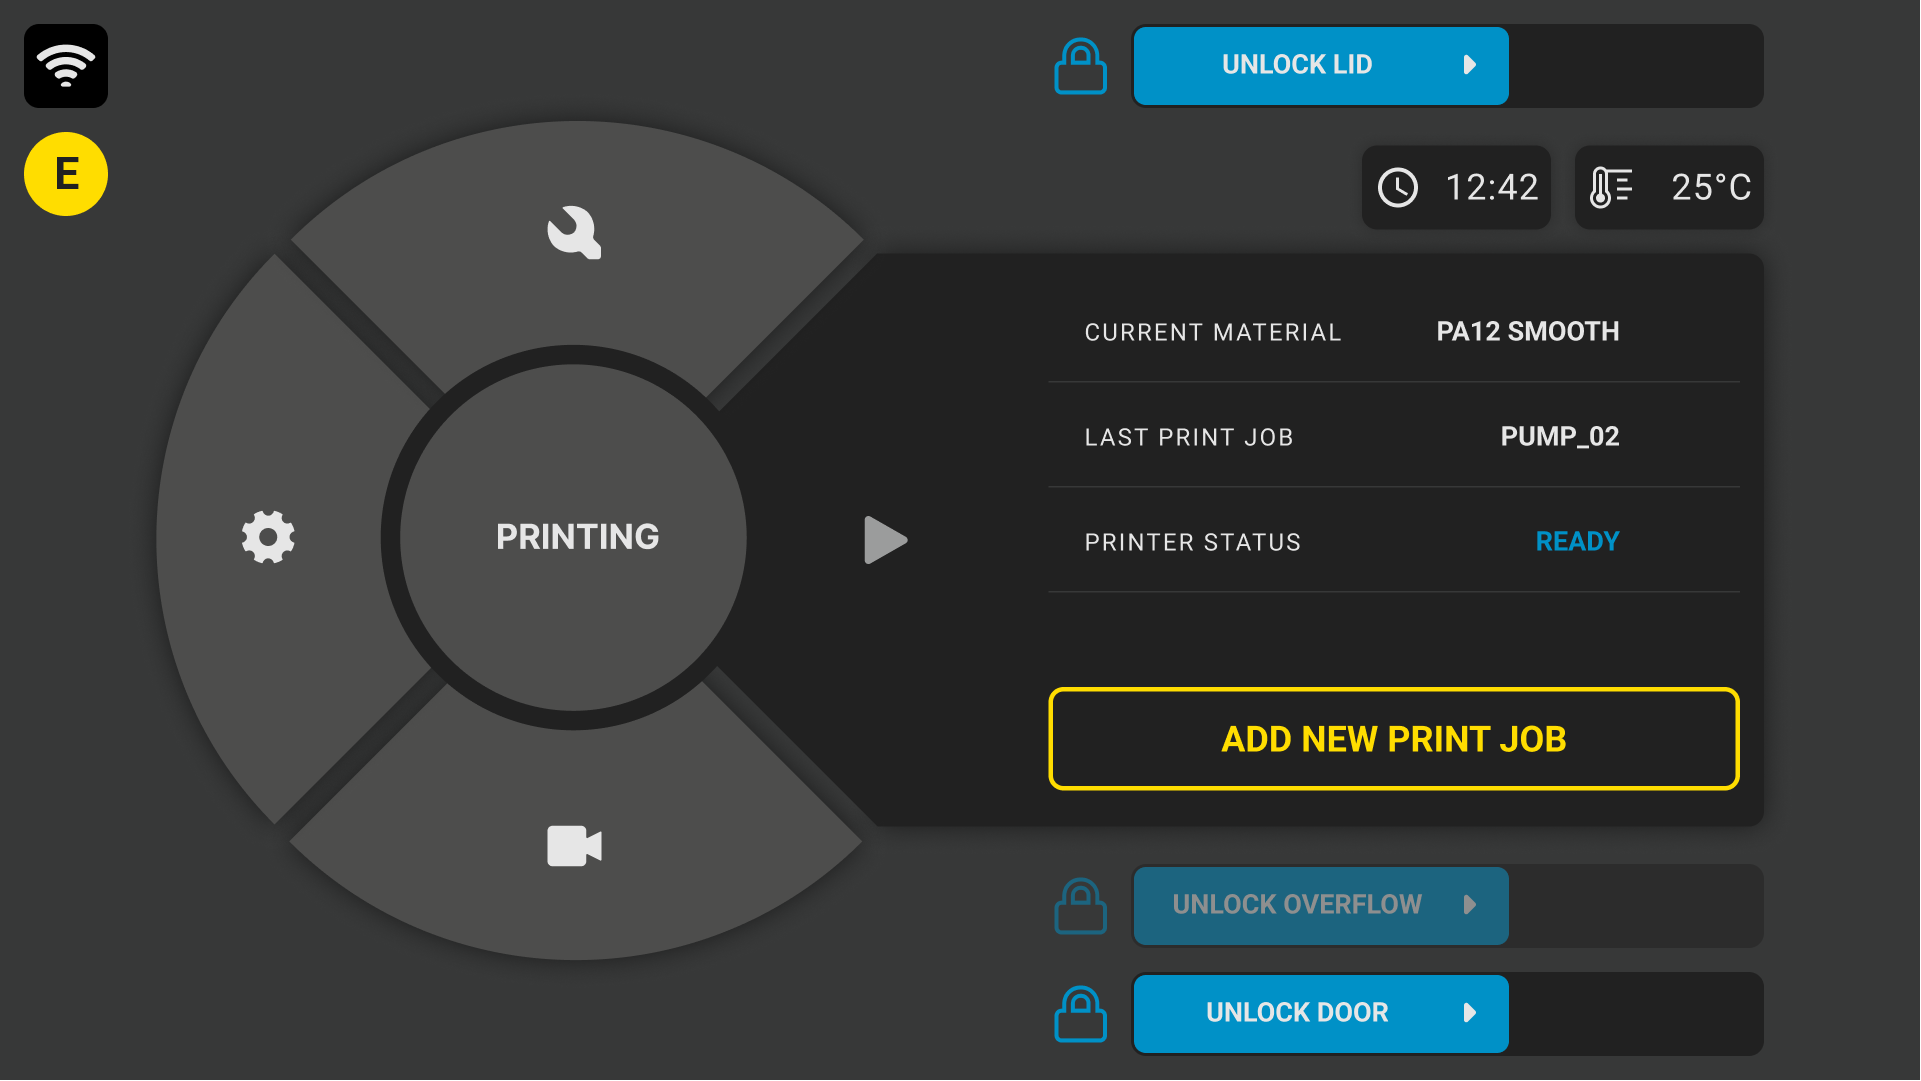
- Main menu
-
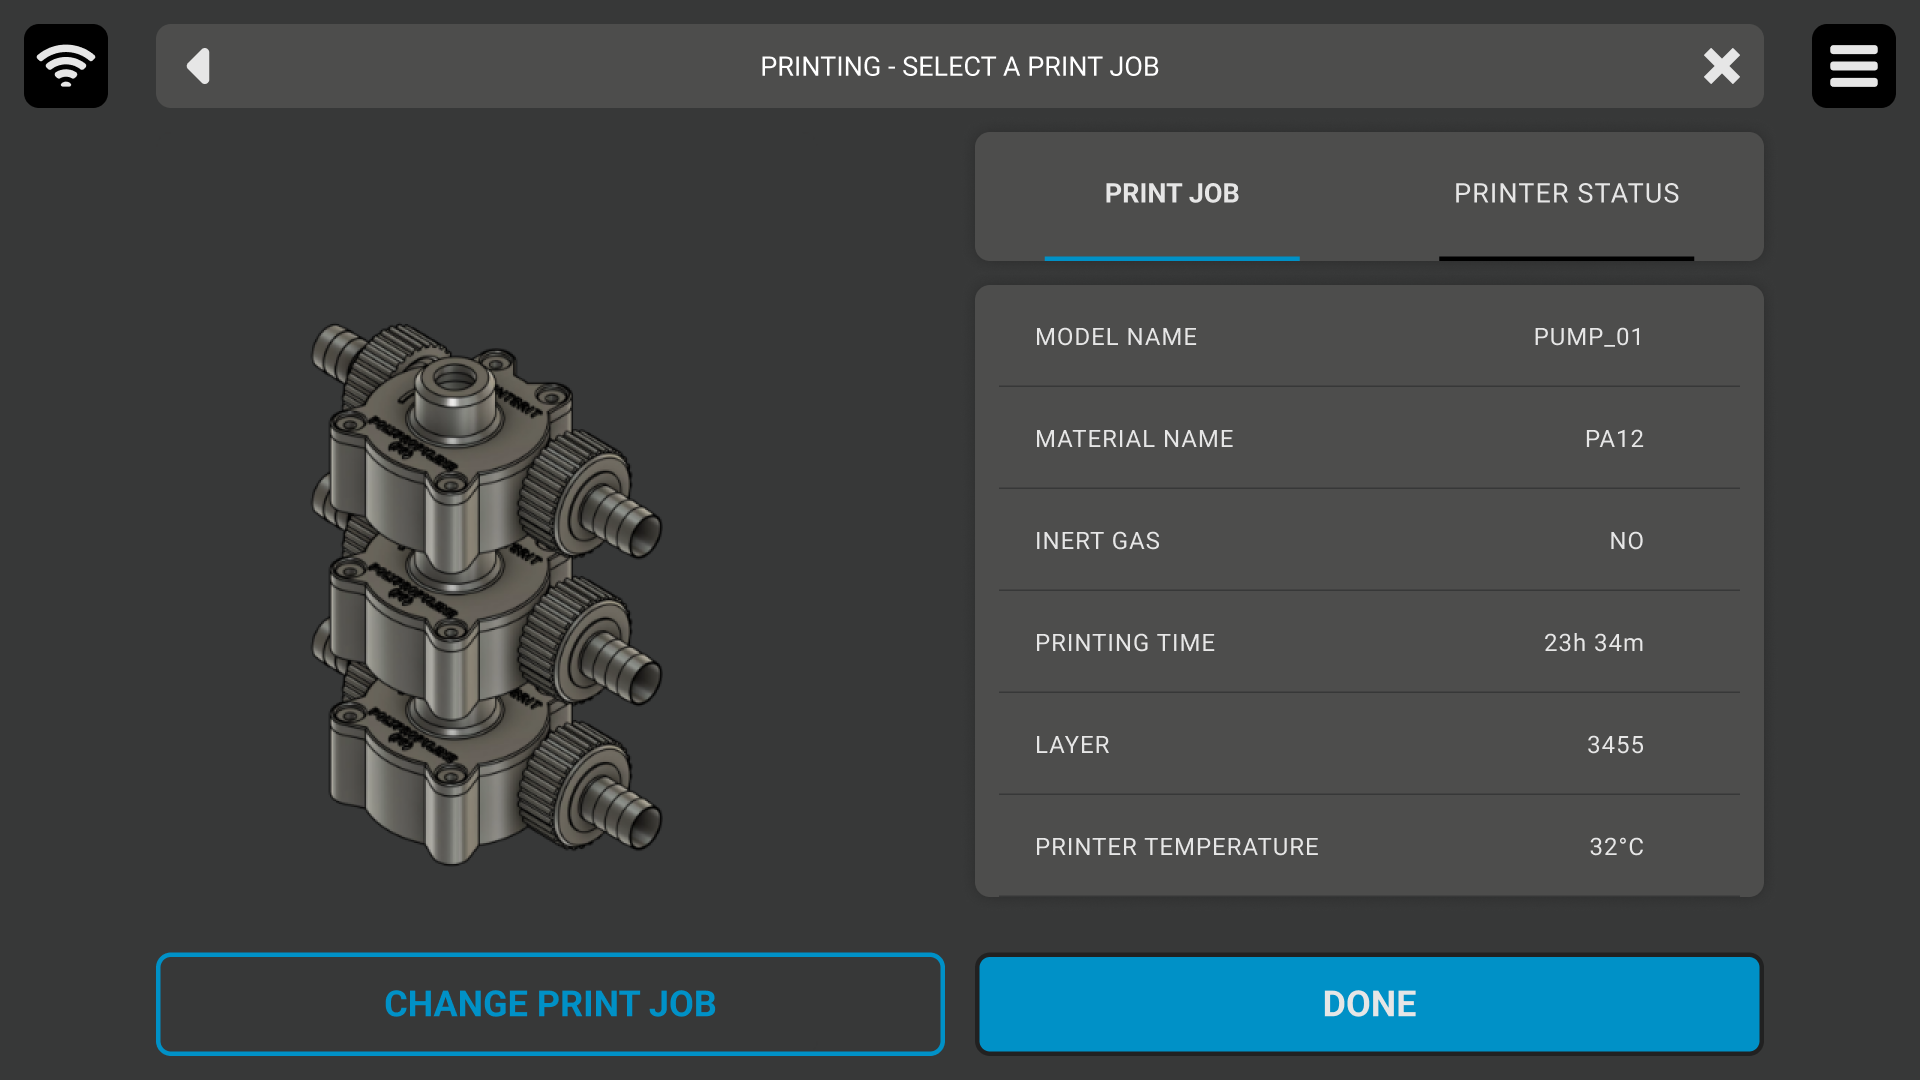
- Selected file
-

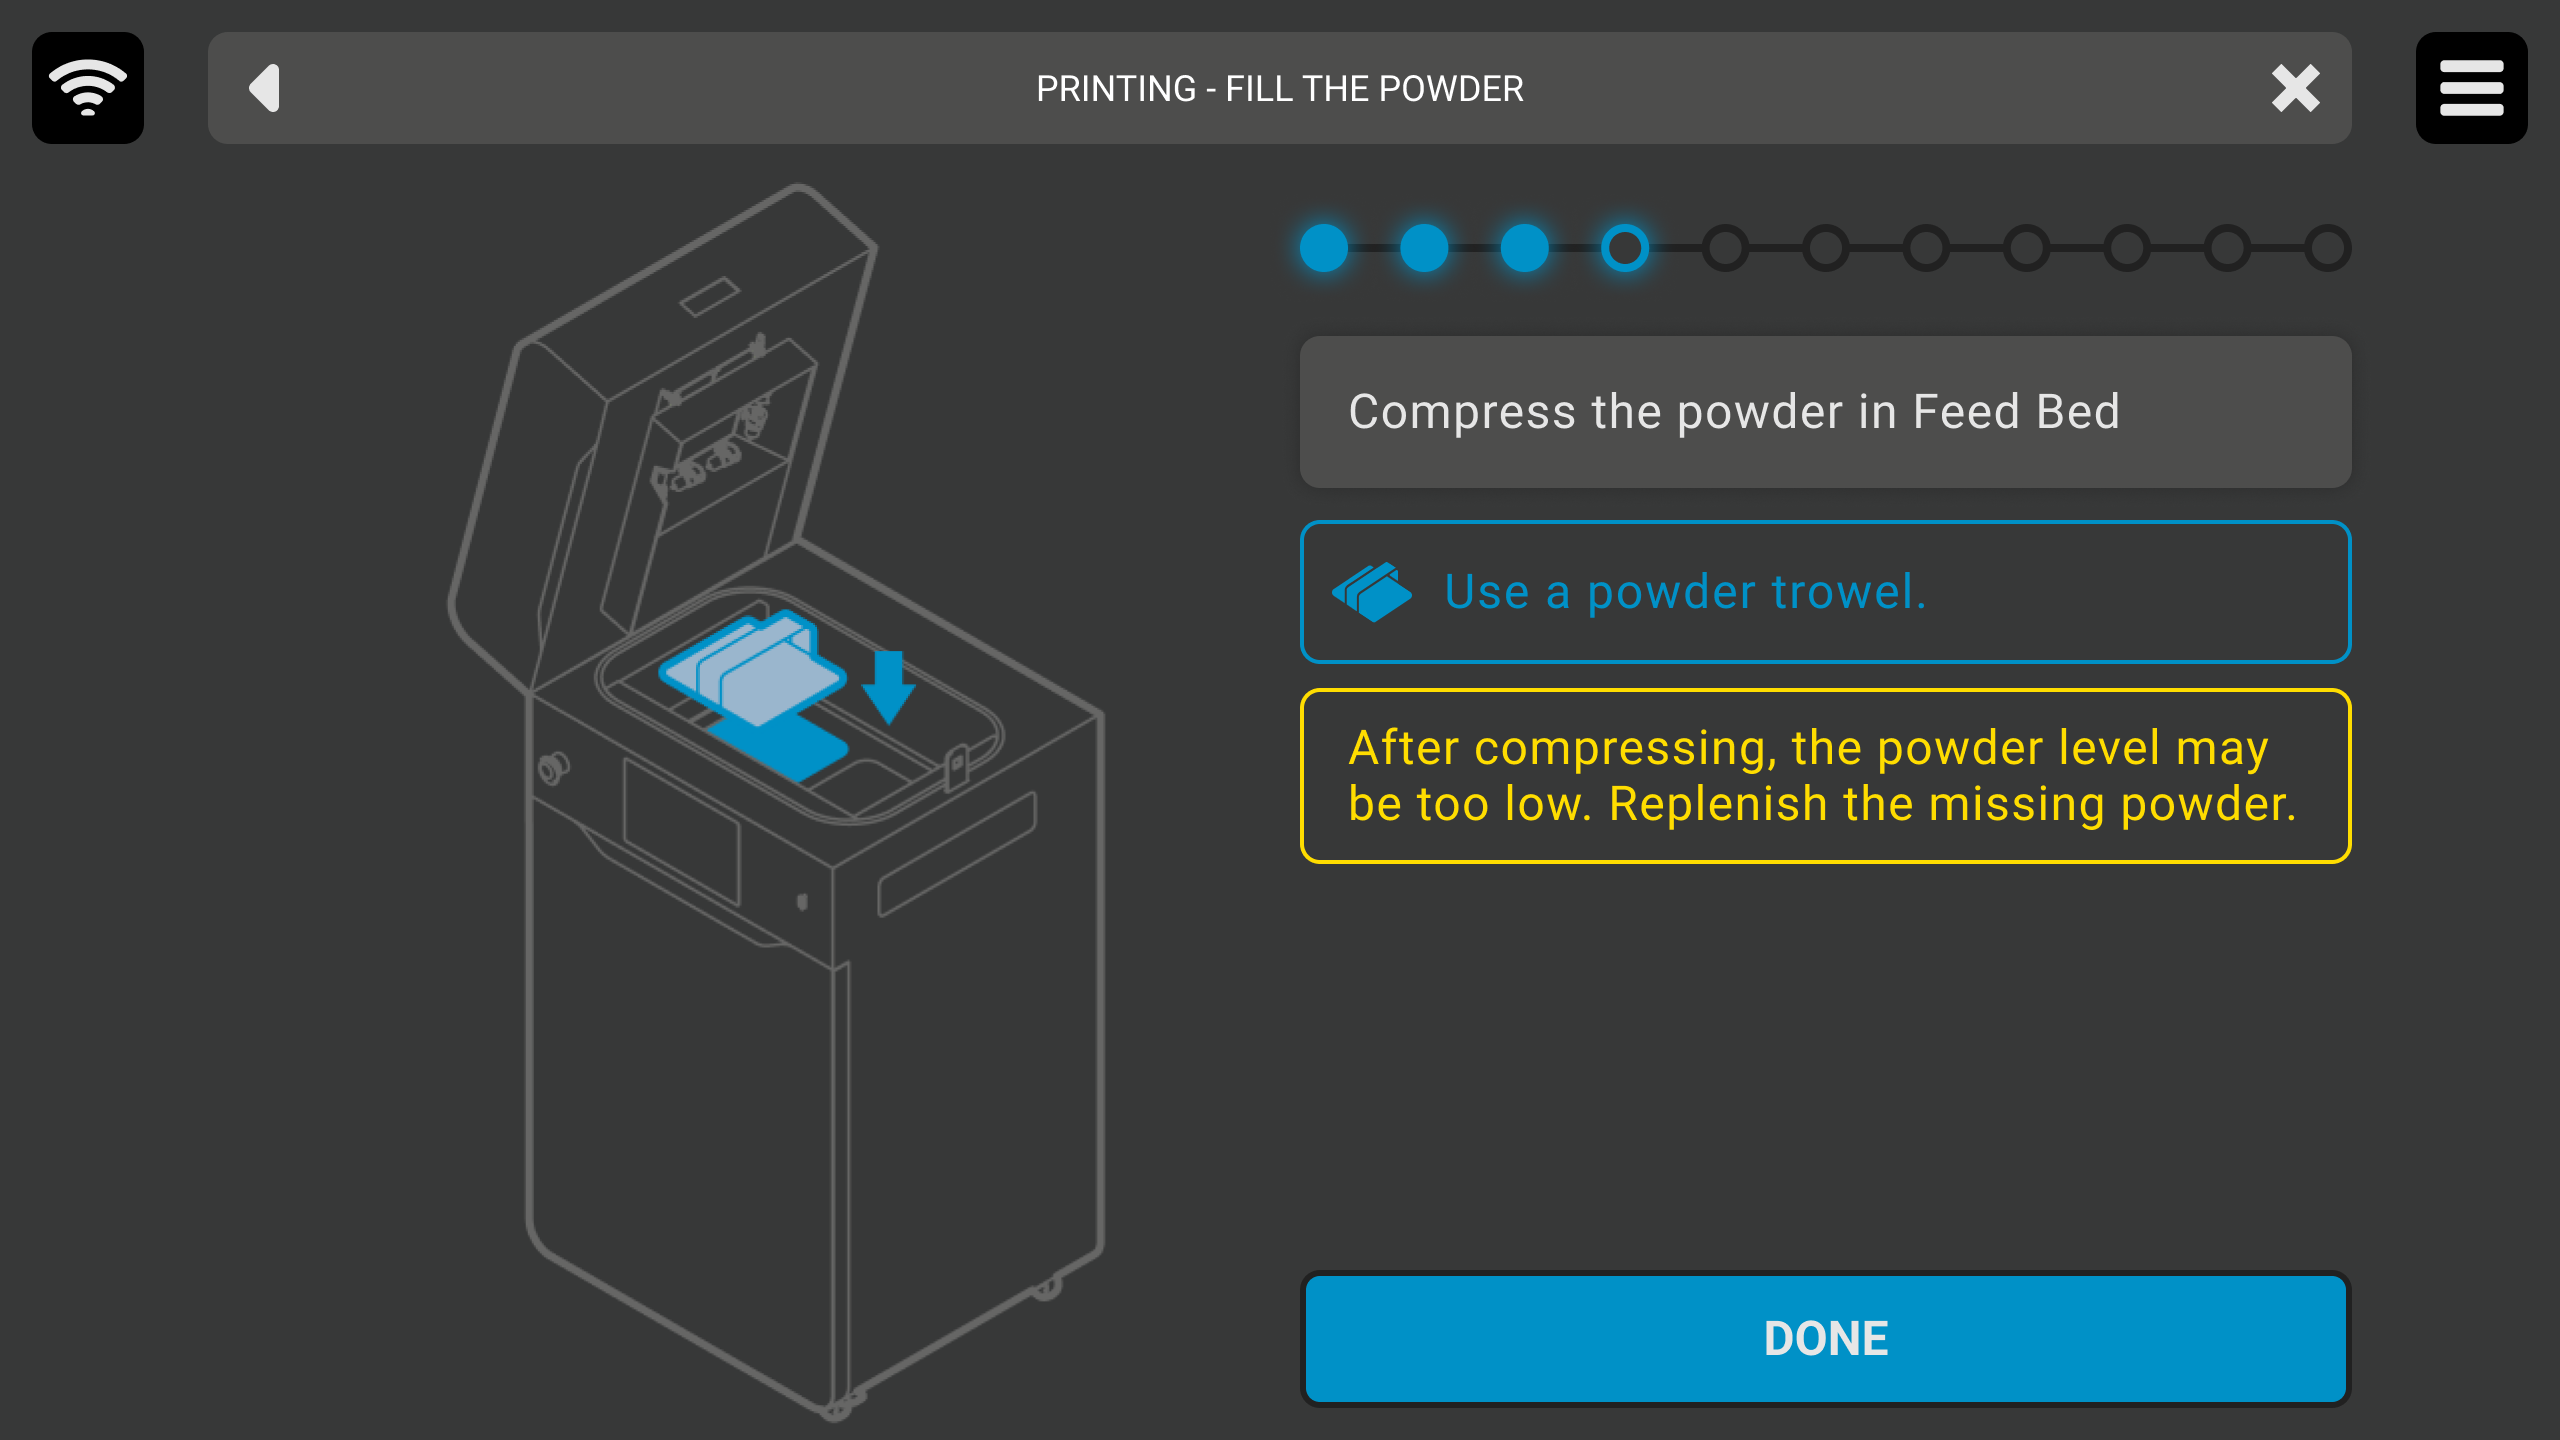
- Pre-printing process
-
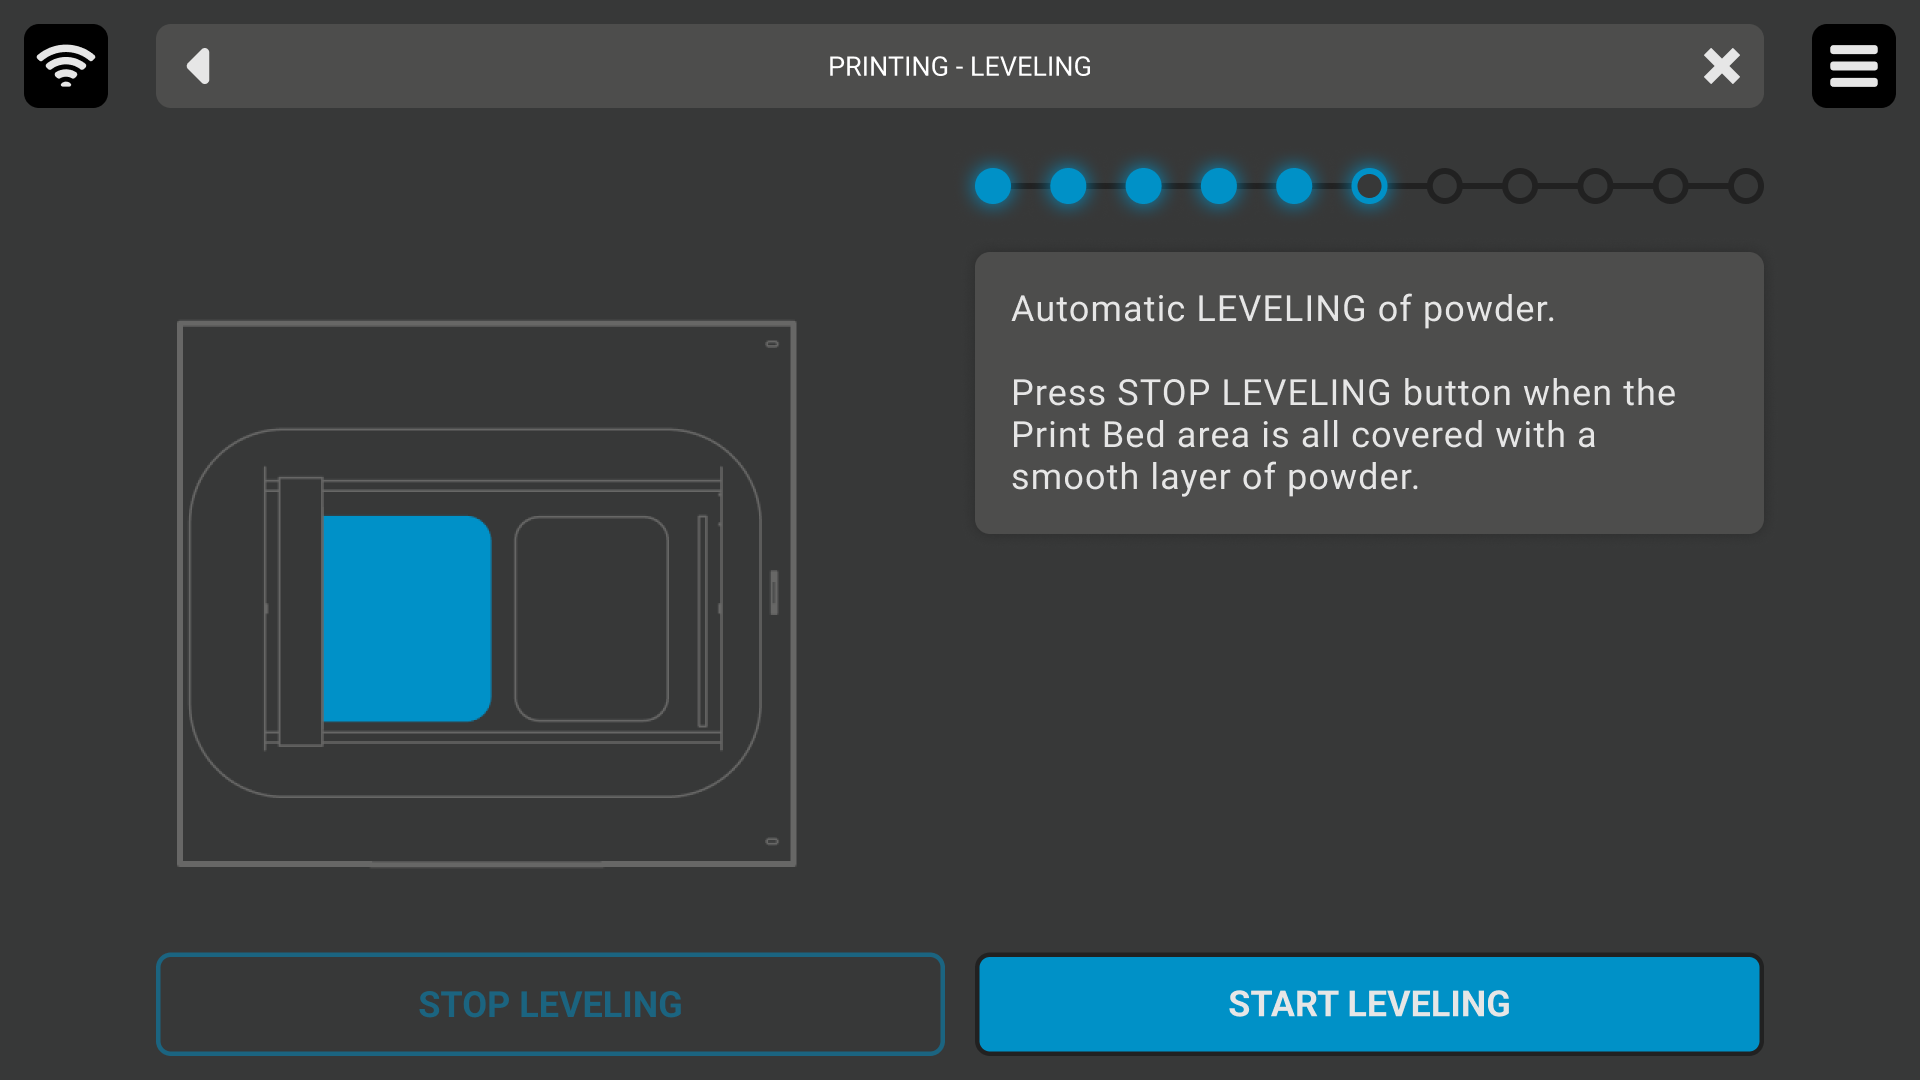
- Pre-printing process
-
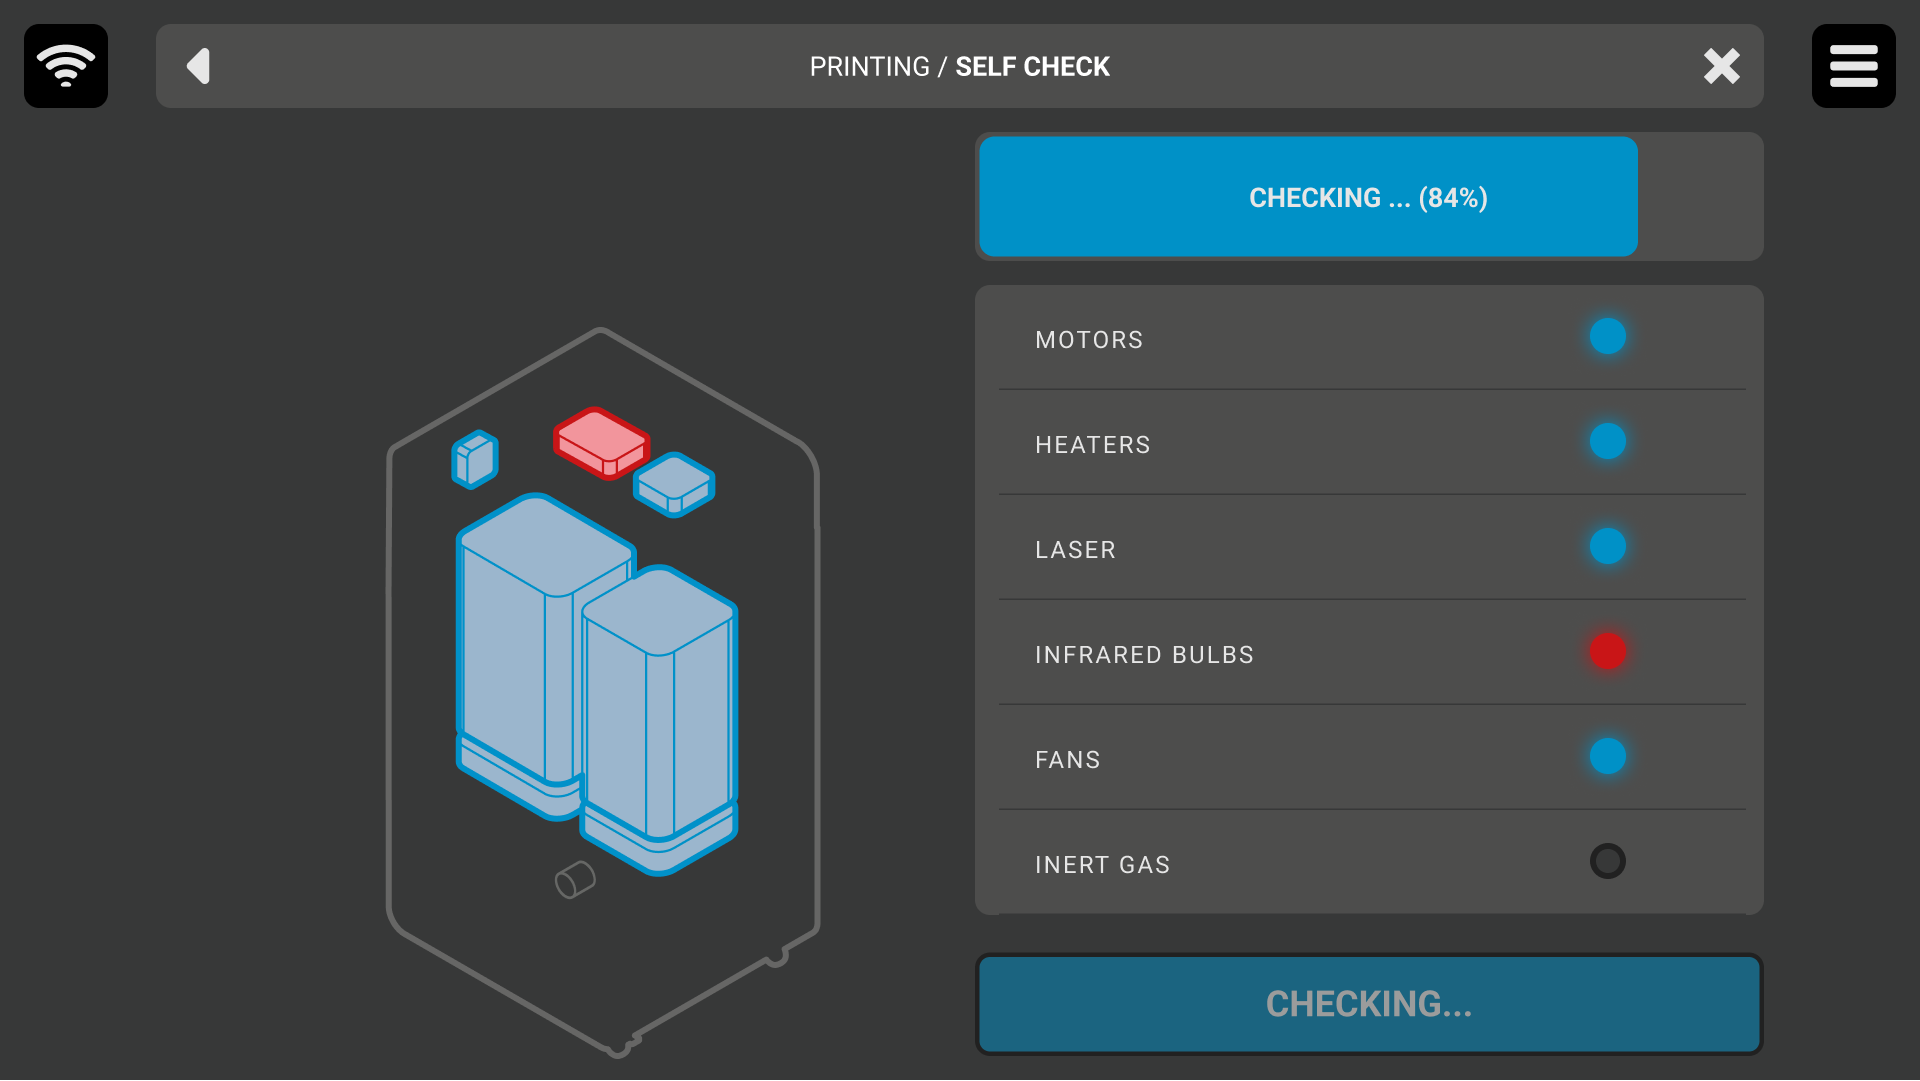
- Self-check
-
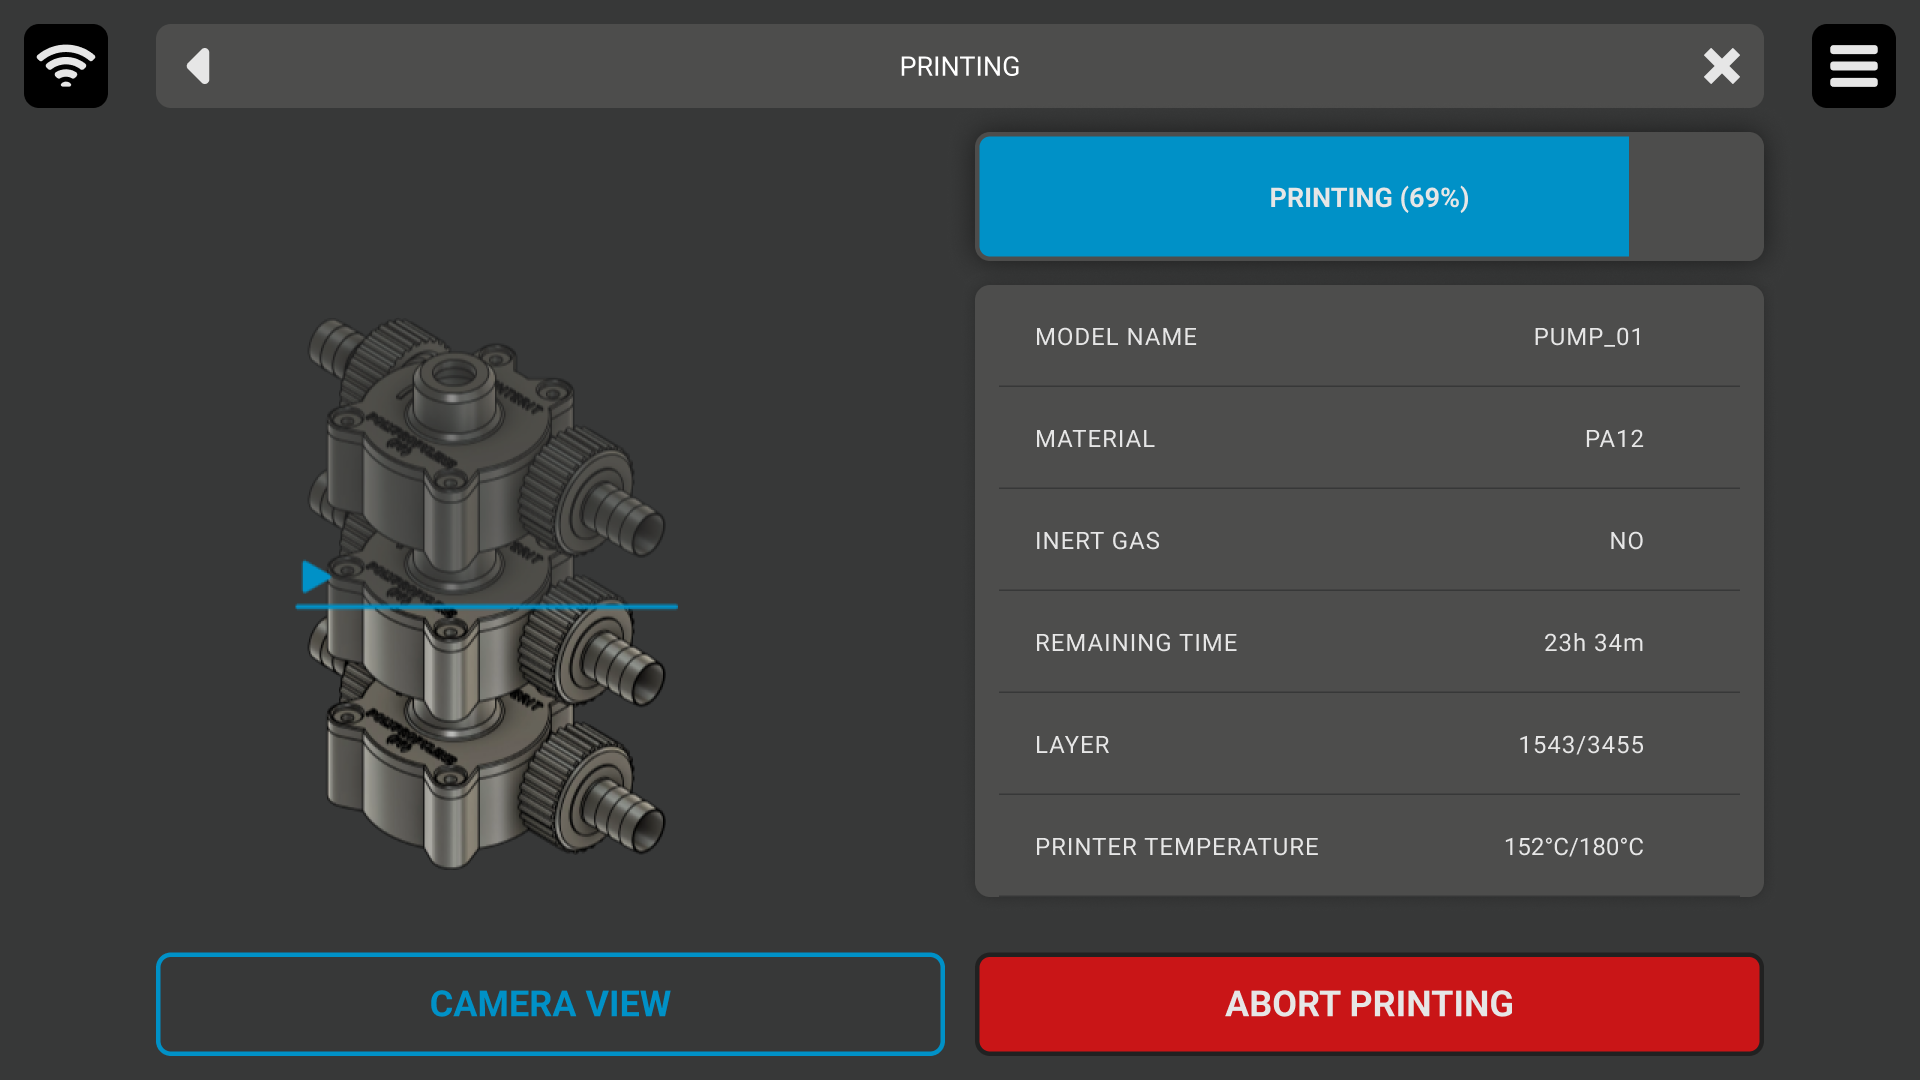
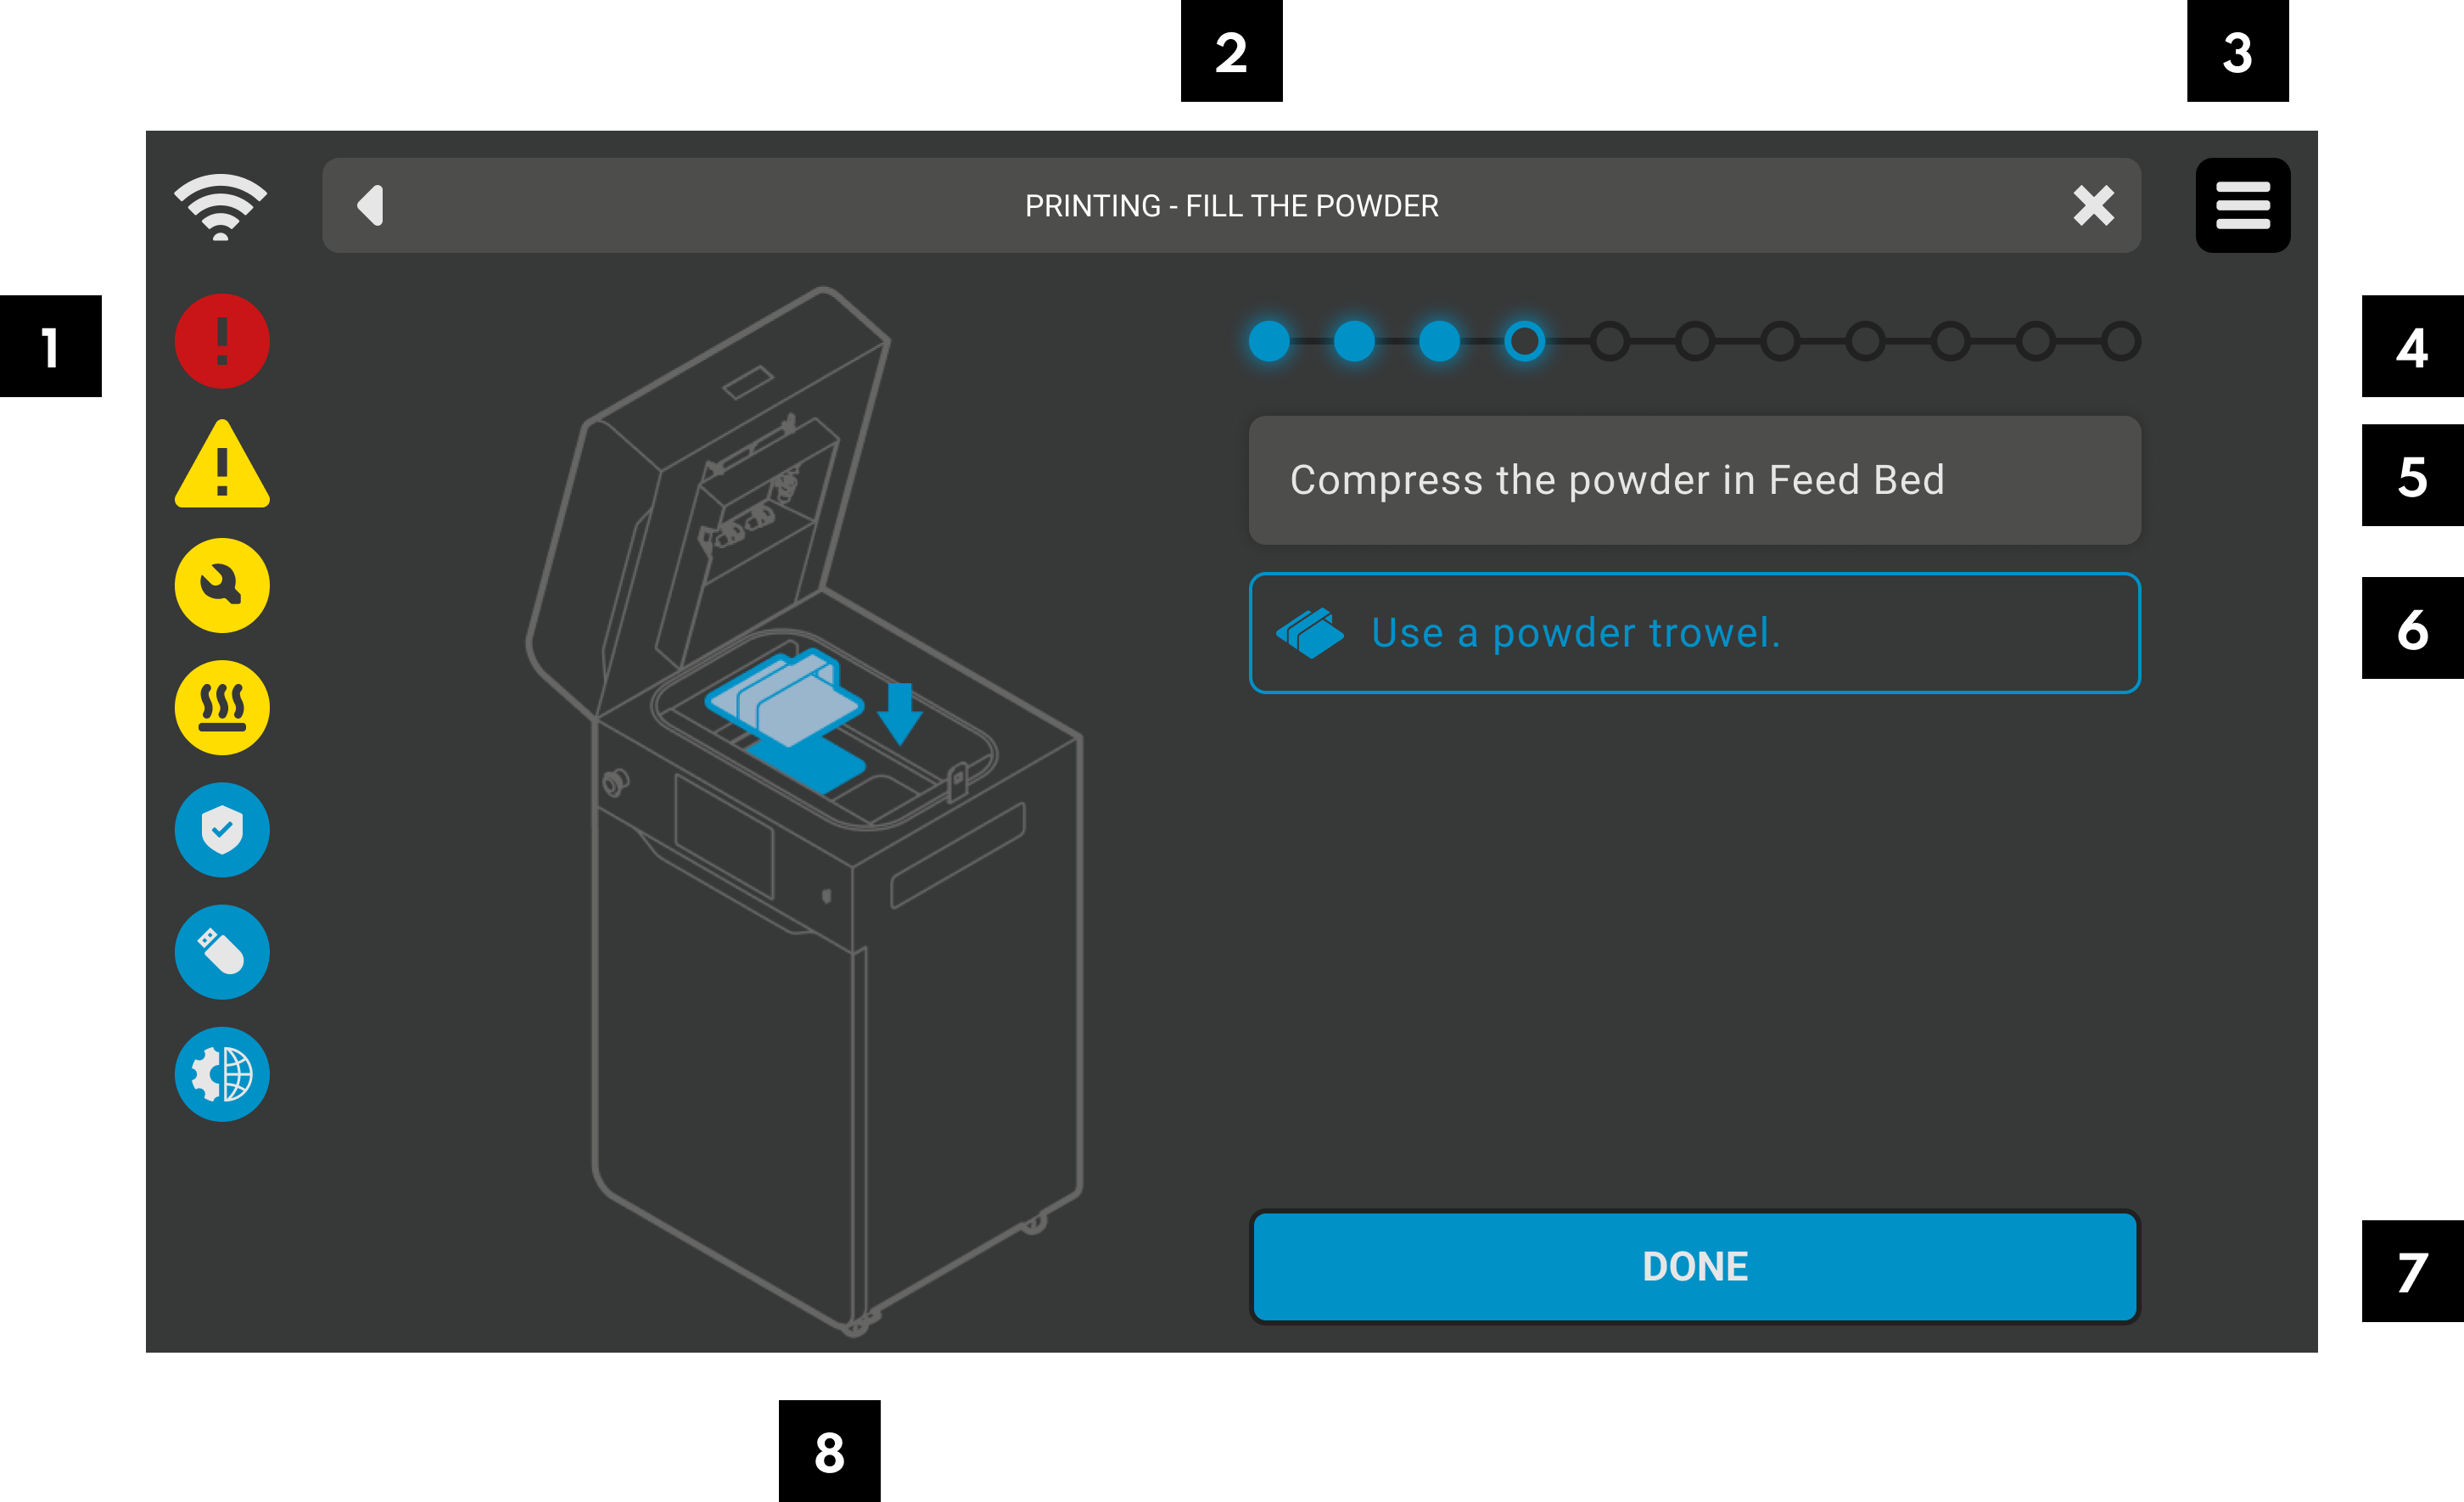
- Printing screen
-

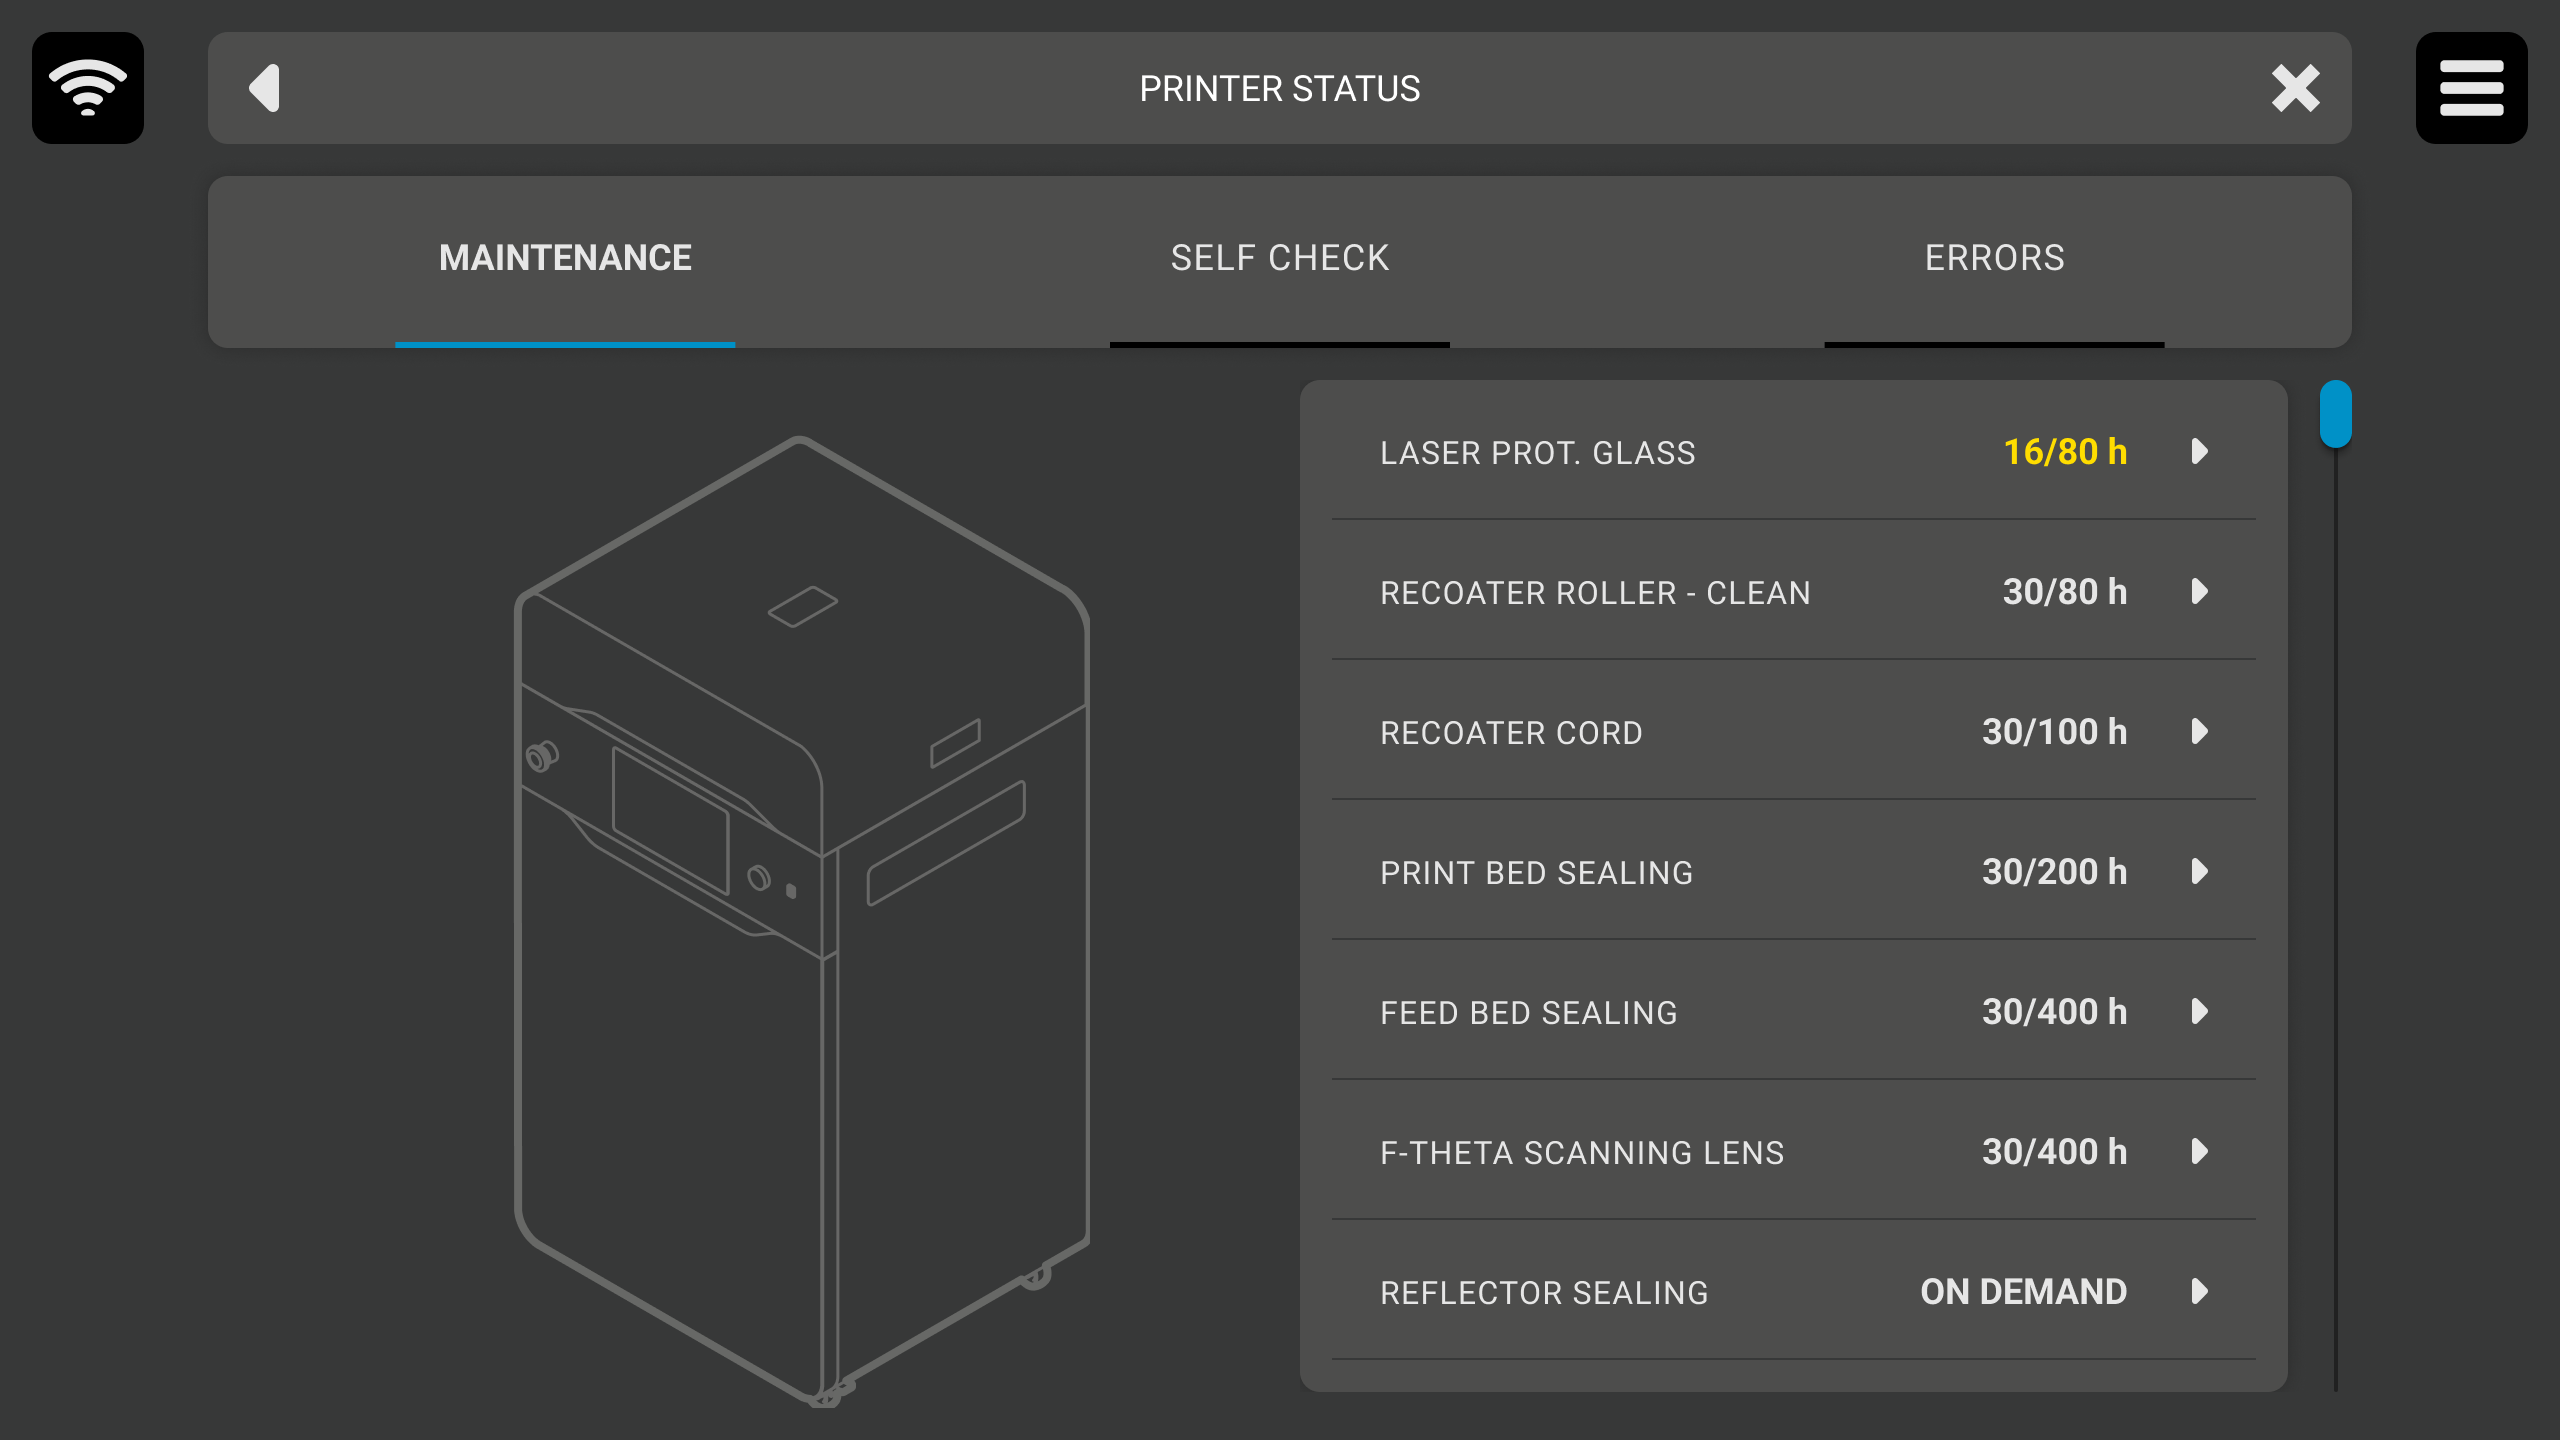
- Monitoring components lifespan
-
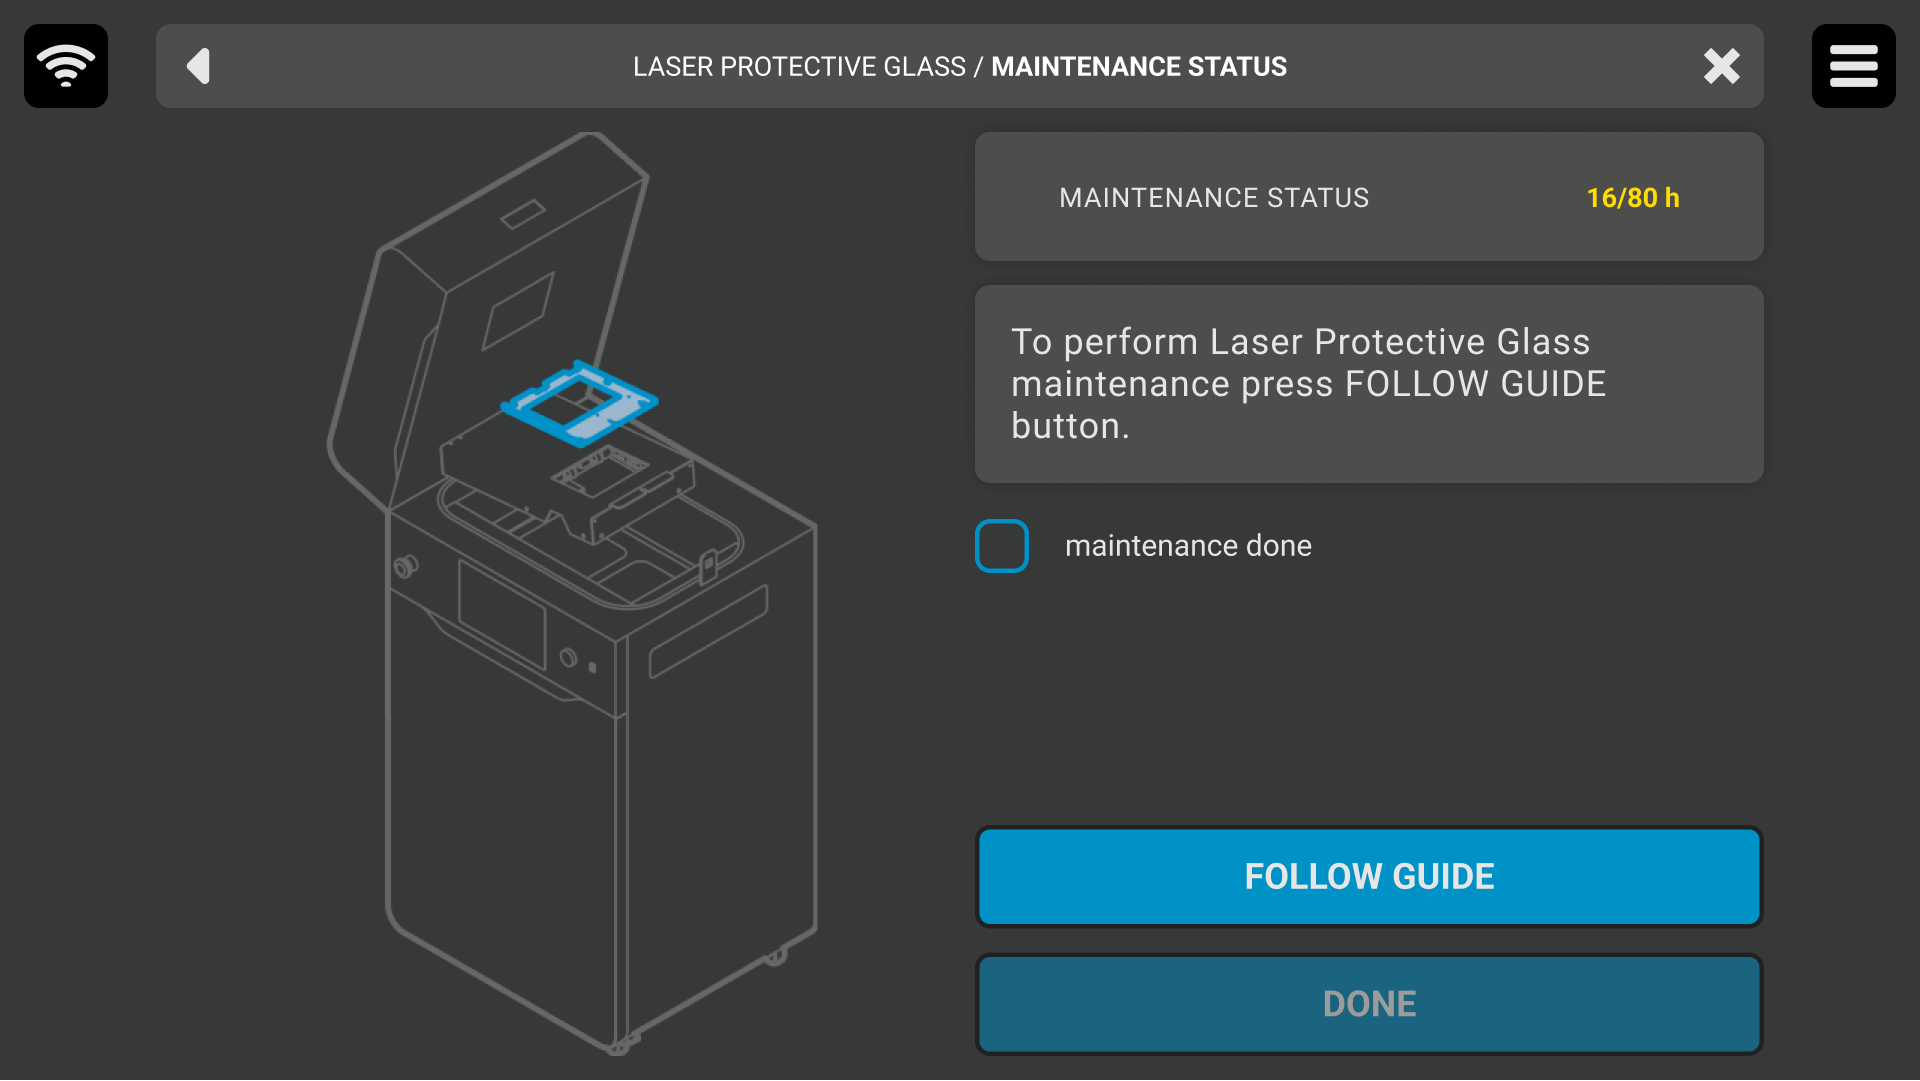
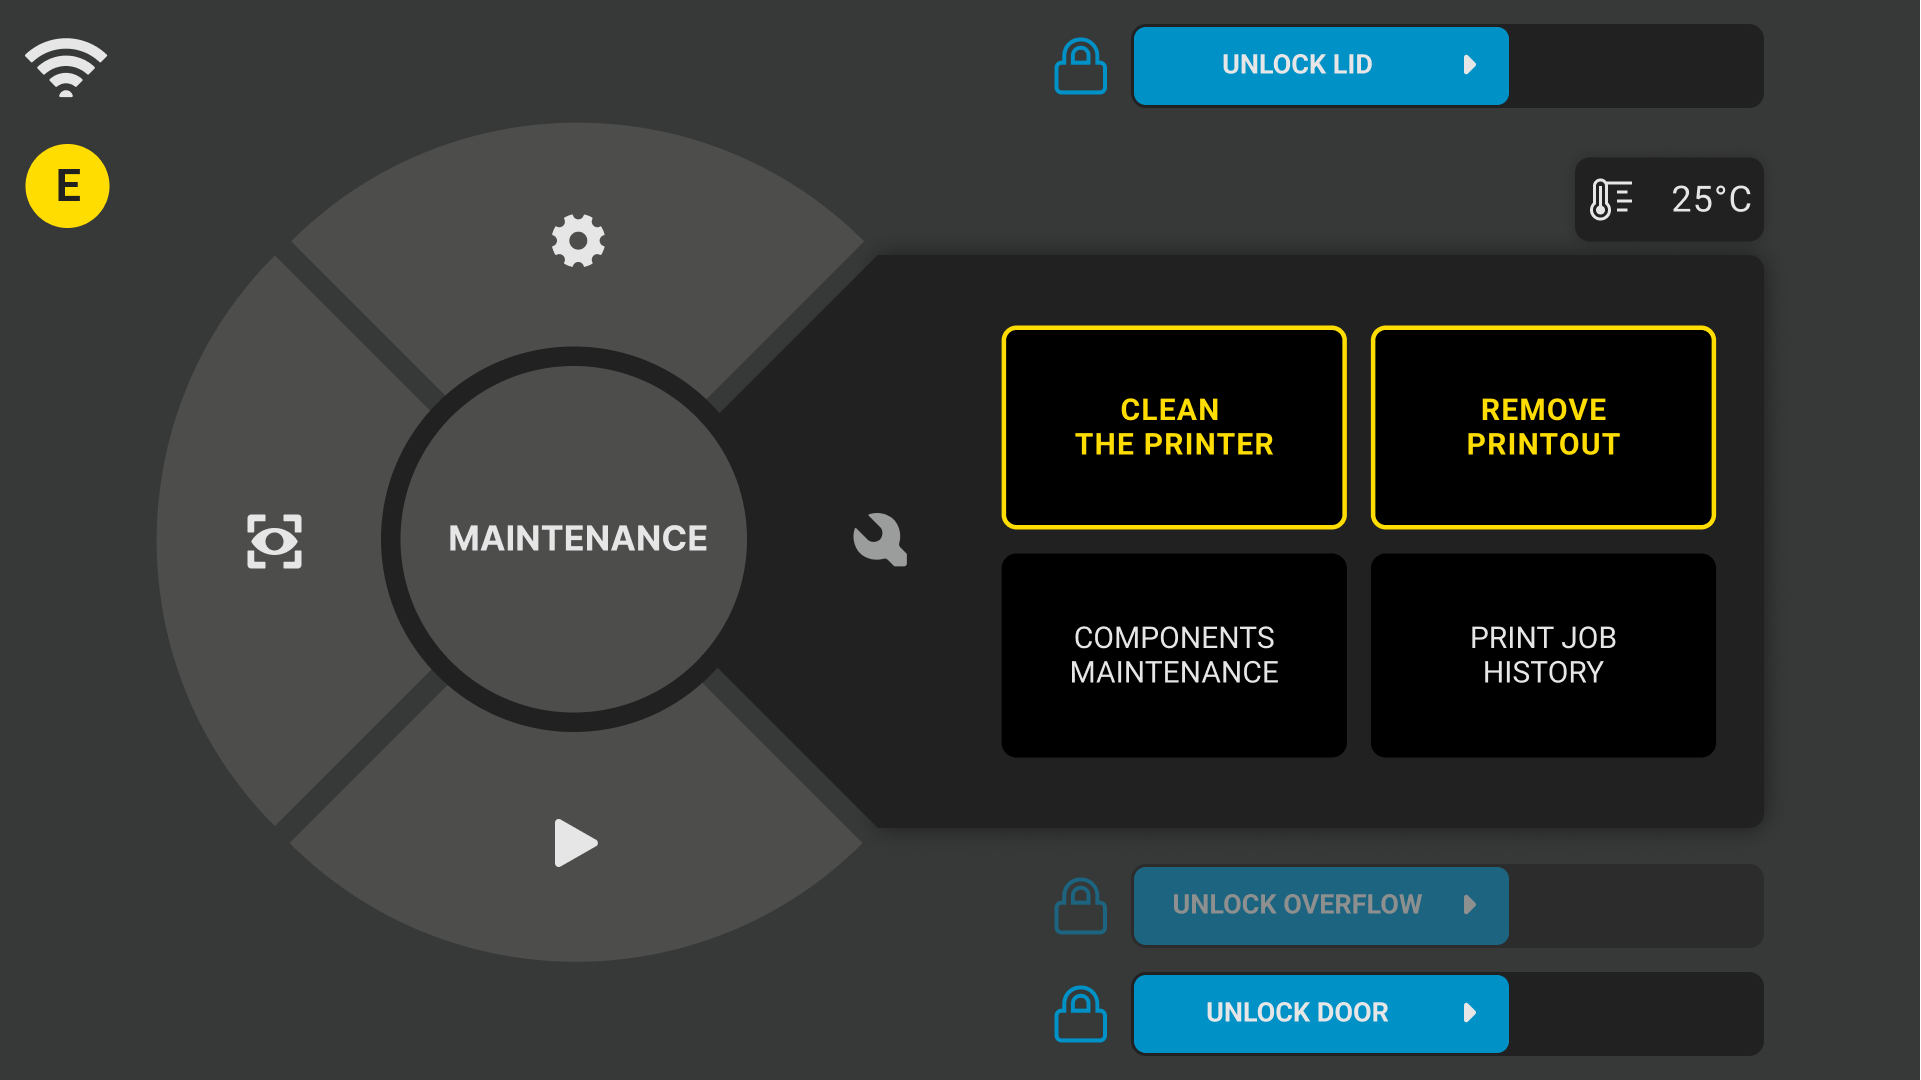
- Maintenance description
-
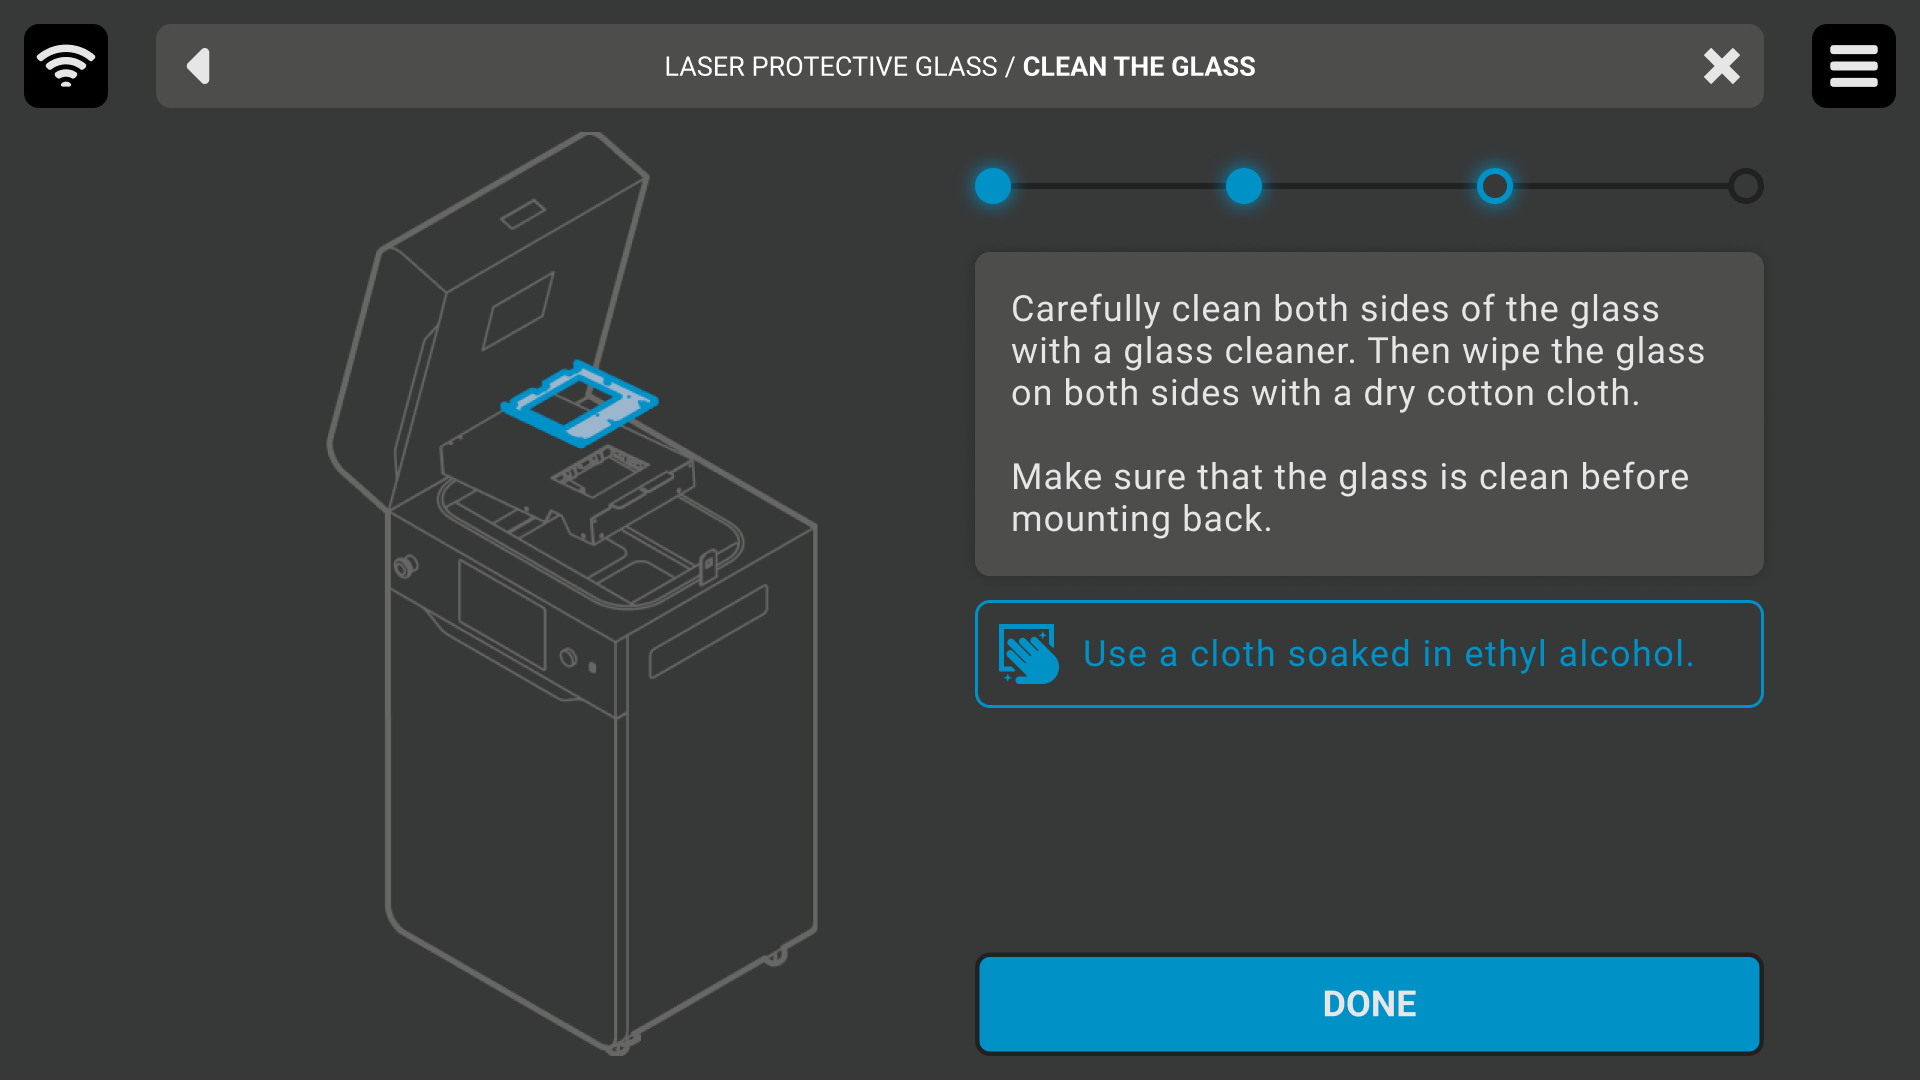
- Maintenance user guide

-
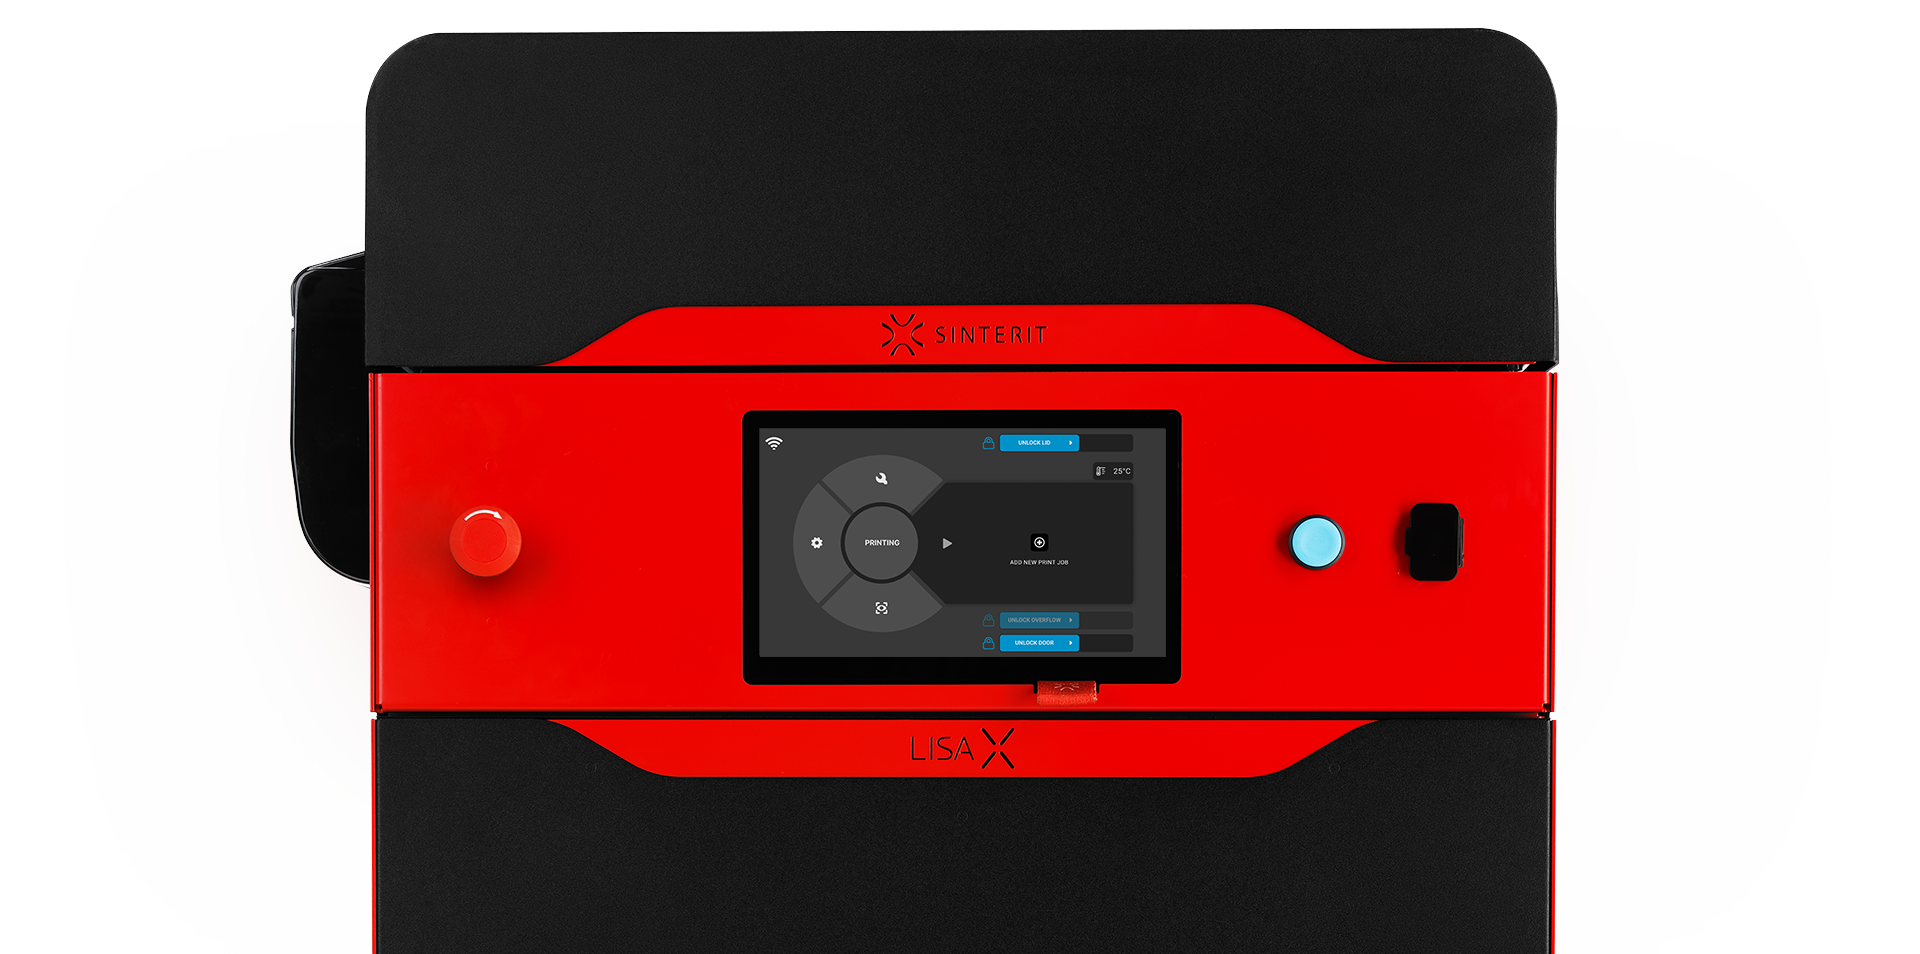
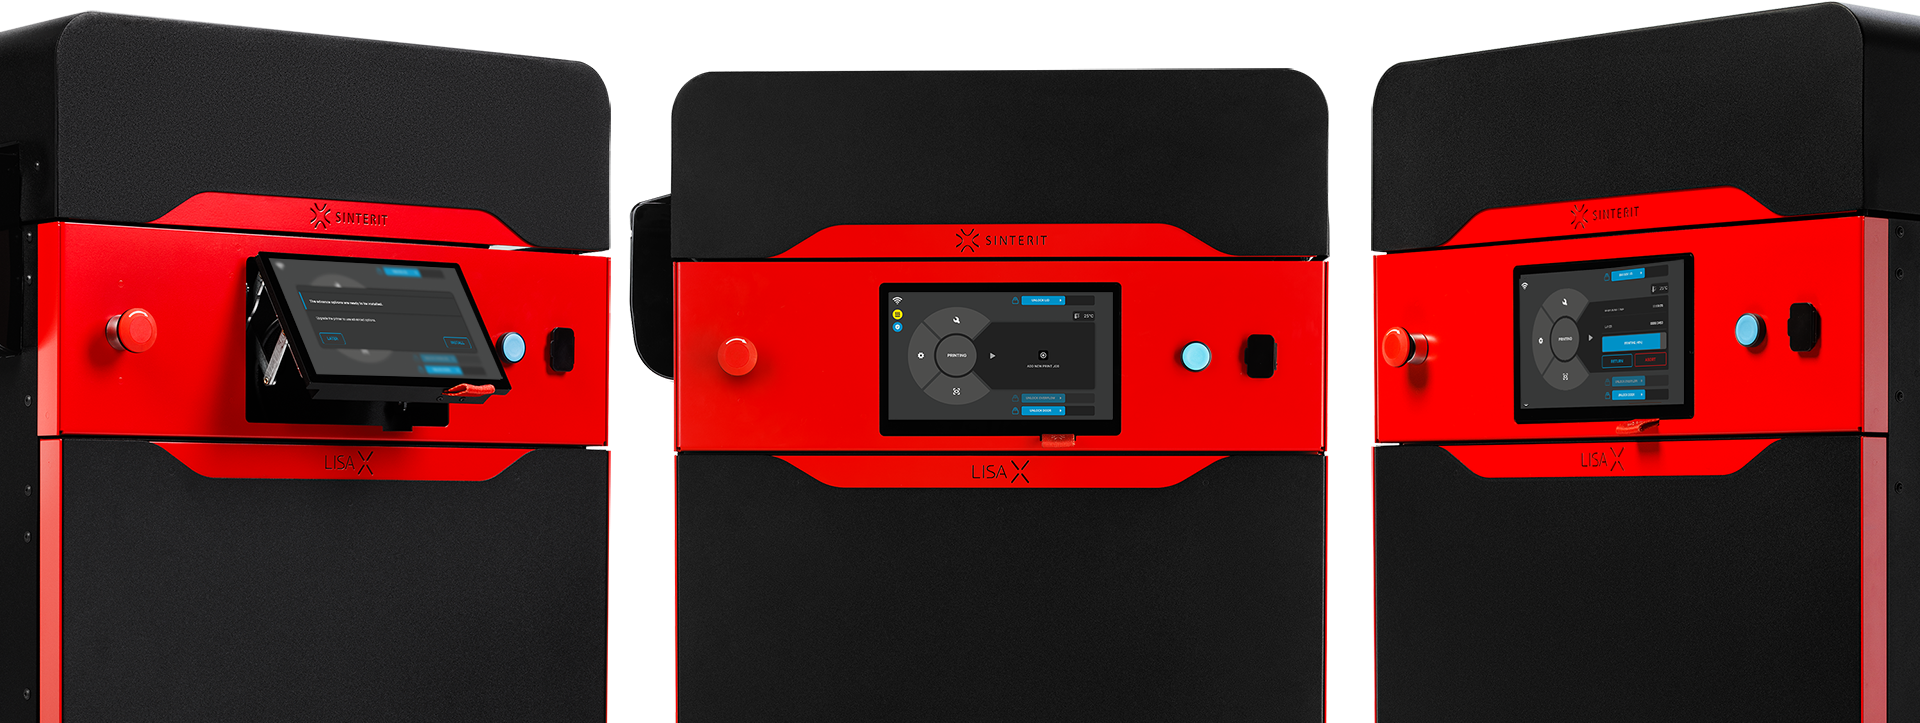
- Main screen
-
- Submenu view
-
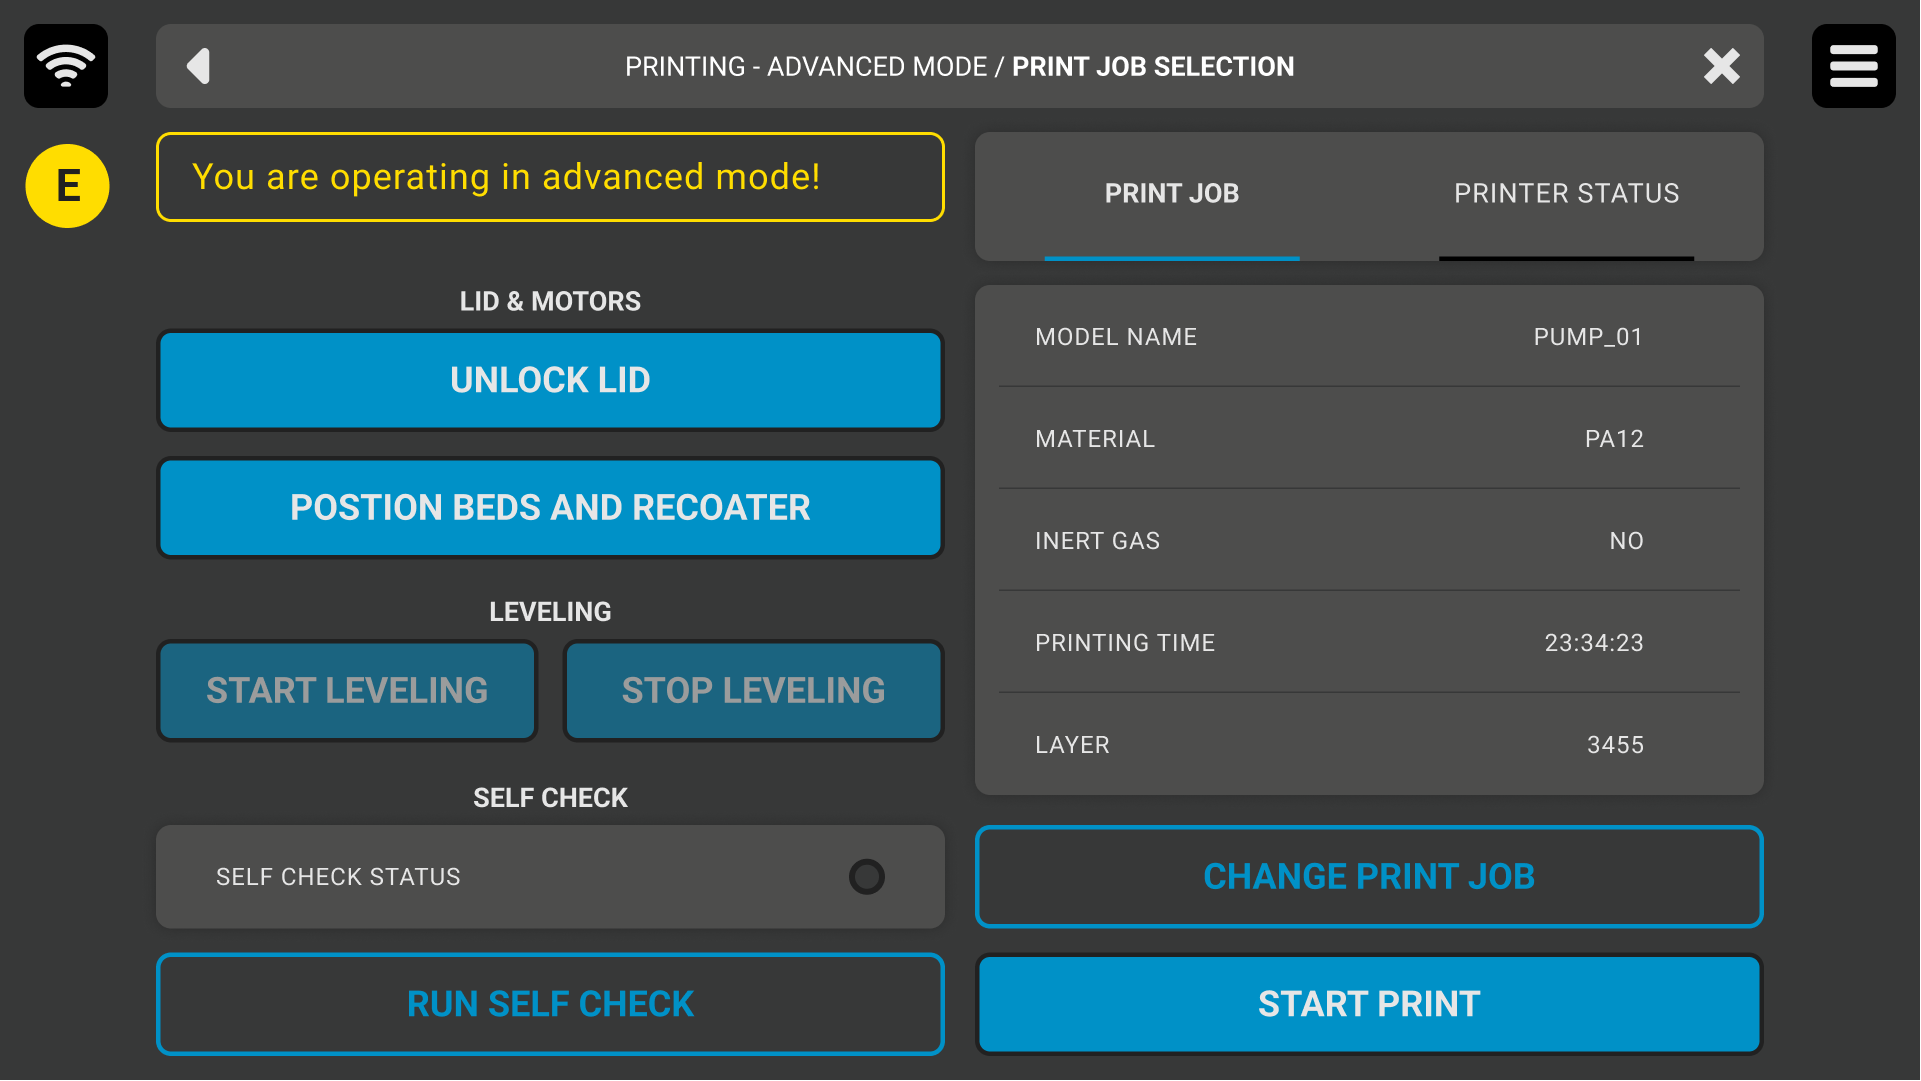
- Start print